Note: When assembling, tighten the bolts to the tightening torques shown in the figure.
1. Install the transfer case housing (68).
2. Install the oil guide (67).
3. Install the oil reservoir cover (66).
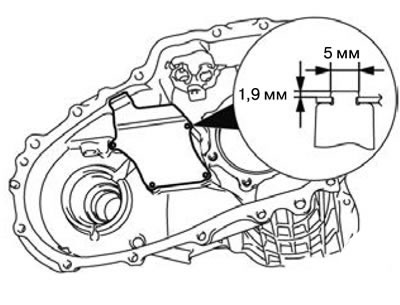
1) Install the oil reservoir cover onto the new transfer case housing. Lock the transfer case cover at the points shown in the figure.
4. Install the oil seal (65).
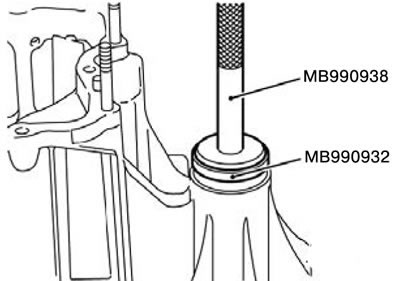
1) Install the oil seal using special tools MB990938 and MB990932.
2) Apply special grease to the edge of the seal.
Special grease: Mitsubishi Part No. 0101011 or equivalent.
5. Install the dust seal guard (64).
6. Install the transfer case drive shaft (63).
7. Install the rear bearing mount (62).
8. Tighten the seal bolt (61).
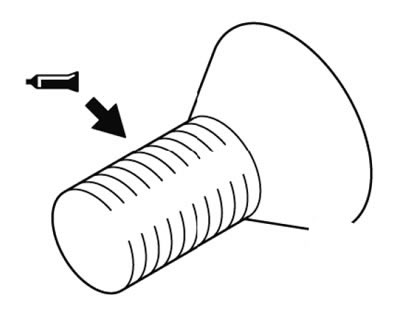
1) Apply special lubricant to the bolt threads.
Special lubricant: ZM STUD Locking No. 4170 or similar.
Note: Do not apply grease to new bolts as they are already lubricated.
9. Install the needle bearing (60).
10. Install the low speed gear (59).
11. Install the HL(58) coupling sleeve.
12. Install the spring ring (57).
1) Select a suitable ring so that the axial clearance of the HL coupling sleeve is within the standard values, and install the spring ring on the transfer case drive shaft. Standard value: 0 - 0.08 mm.
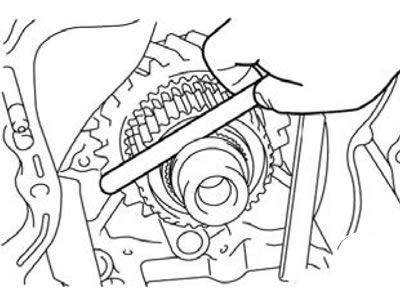
13. Install the H-L shift fork (56).
1) Apply special grease to the shift fork shaft and install the shift fork and clutch ring into the transfer case housing.
Special grease: Mitsubishi Part No. 0101011 or equivalent.
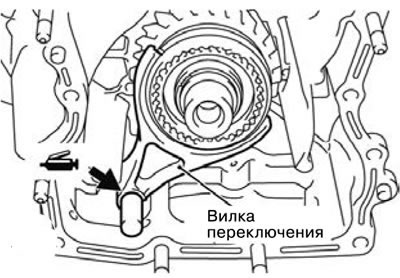
14. Install the HL clutch ring (55).
15. Install the washer (54).
16. Install the counter shaft gear (53).
17. Install the needle bearing (52).
18. Install the transfer case housing plate (51).
1) Apply special grease to the specified points on the shift shaft inside the transfer case housing plate.
Special grease: Mitsubishi Part No. 0101011 or equivalent.
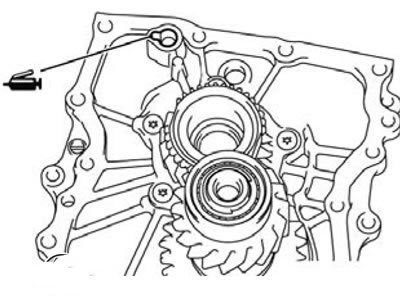
2) Turn the toothed part of the input gear in the direction shown in the figure.
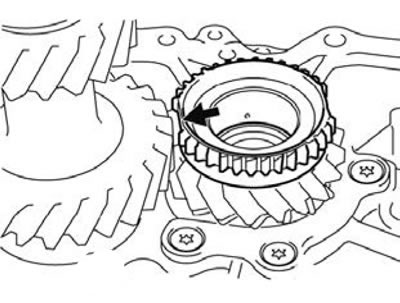
3) Apply special grease to the transfer case housing.
Special grease: Mitsubishi Part No. MD997740 or equivalent.
Caution: If the central gear is not fully engaged with the counter shaft pinion, turn the transfer case input shaft.
4) Make sure that the input gear toothed portion is positioned as shown in step 2, and install the transfer case housing plate.
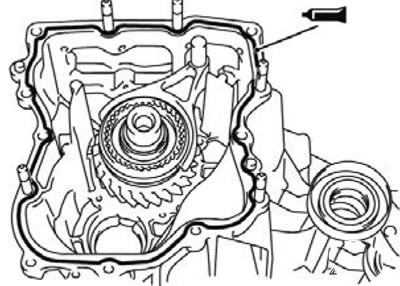
19. Install the differential lock bushing (50).
20. Install the spring ring (49).
1) Select a suitable ring so that the axial clearance of the differential lock sleeve is within the standard values, and install the spring ring on the transfer case drive shaft.
Standard value: 0 - 0.08 mm.
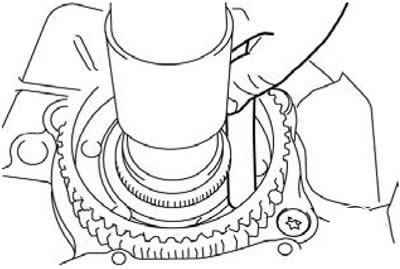
21. Install the steel ball (48).
1) Install the steel ball as shown in the figure on the drive shaft of the transfer case and install the washer so that its groove fits against the chain cover.
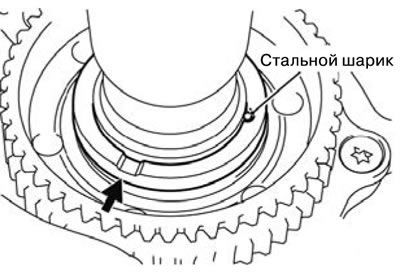
22. Install the washer (47).
23. Install the 2-4WD shift fork (46).
24. Install the 2-4WD clutch ring (45).
1) Apply special grease to the shift fork shaft and install the shift fork and clutch ring into the transfer case housing. Special grease: Mitsubishi Part No. 0101011 or equivalent.
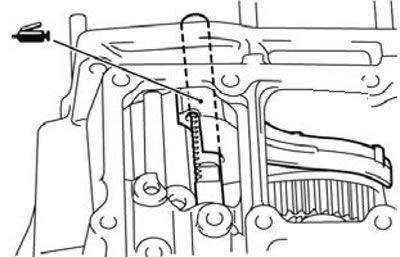
25. Install the wave spring (44).
26. Install the needle bearing (43).
27. Install the central gear wheel (42).
28. Install the 2-4WD clutch sleeve (41).
29. Install the spring ring (40).
1) Install the 2-4WD clutch sleeve onto the center gear.
2) Select a suitable ring so that the axial clearance of the 2-4WD clutch sleeve is within the standard value, and install the snap ring on the central gear.
Standard value: 0 - 0.08 mm.
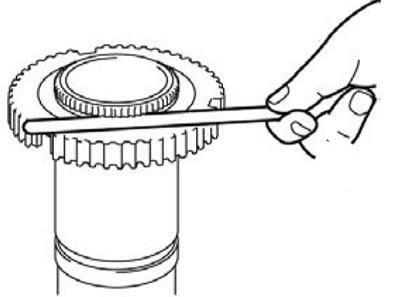
30. Install the inner synchronizer spring (39).
31. Install the outer synchronizer ring (38).
32. Install the inner synchronizer cone (37).
33. Install the inner synchronizer ring (36).
1) Assemble the outer synchronizer ring, synchronizer cone and inner synchronizer ring, press onto the drive sprocket, and measure the distance shown in the figure.
Limit value: 0.3 mm.
2) If the distance exceeds the limit value, replace the synchronizer rings.
3) Apply oil to the outer synchronizer ring and the inner synchronizer ring.
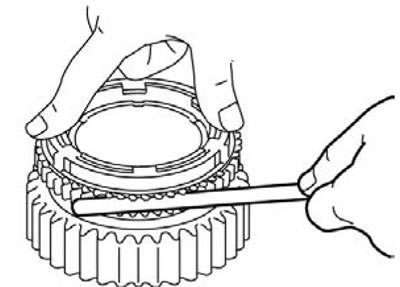
4) Align the toothed portion of the 2-4WD clutch sleeve with the design portion of the synchronizer ring and install the ring onto the 2-4WD clutch sleeve.
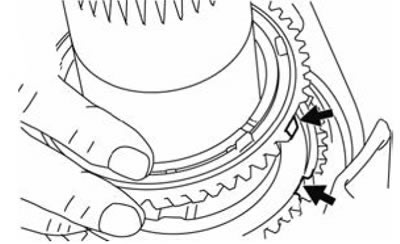
34. Install the needle bearing (35).
35. Install the drive sprocket (34).
36. Install the front output shaft (33).
37. Install the chain (32).
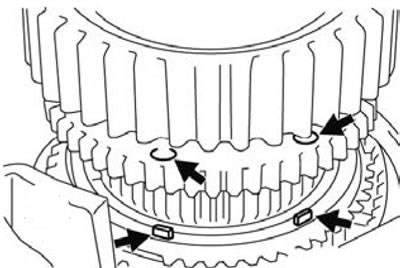
1) Engage the chain with the drive gear and sprocket of the front output shaft and install them in the transfer case housing.
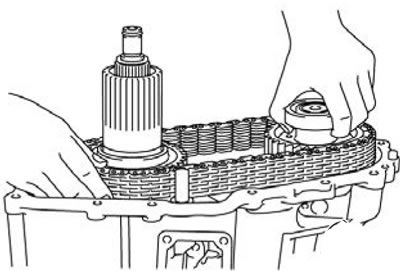
2) Install the drive sprocket as shown in the figure.
38. Install the viscosity coupling (31).
39. Install the planetary bearing of the central differential (30).
40. Install the spring ring (29).
41. Install the needle bearing (28).
42. Install the sealing ring (27).
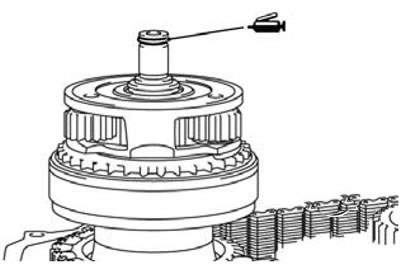
43. Install the rear output shaft (26).
1) Apply special grease to the sealing ring in the places indicated in the figure and install the output shaft.
Special grease: Mitsubishi Part No. 0101011 or equivalent.
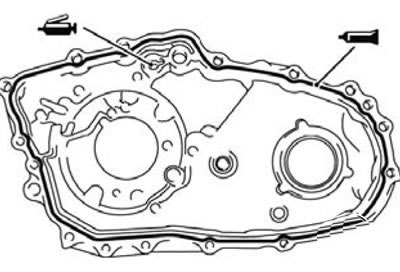
44. Install the chain cover (25).
1) Apply special grease to the indicated areas of the 2-4WD shift shaft.
Special grease: Mitsubishi Part No. 0101011 or equivalent.
2) Apply special grease to the chain cover as shown in the figure.
Special grease: Mitsubishi Part No. MD997740 or equivalent.
45. Install the connector bracket (24).
46. Install the connector bracket (23).
47. Install the gearbox wiring protection (22).
48. Install the spring ring (21).
49. Install the spring ring (20).
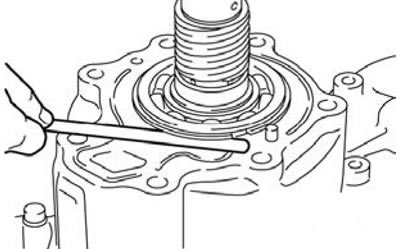
1) Install the spring ring into the groove of the rear output shaft bearing.
2) Measure the gap between the chain cover and the snap ring.
3) Select a spring ring whose thickness is equal to the measured value plus the standard value.
Standard value: 0.12 - 0.24 mm.
4) Remove the snap ring from the rear output shaft bearing groove, install the selected snap ring, and install the removed snap ring into the rear output shaft bearing groove.
50. Install the washer (19).
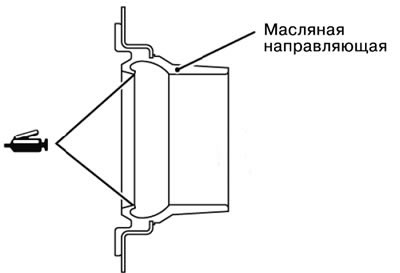
51. Install the oil guide (18).
1) Apply special grease to the edge of the seal.
Special grease: Mitsubishi Part No.0101011 or equivalent.
52. Install the steel ball (17).
53. Install the rotor sensor (16).
54. Install the spring ring (15).
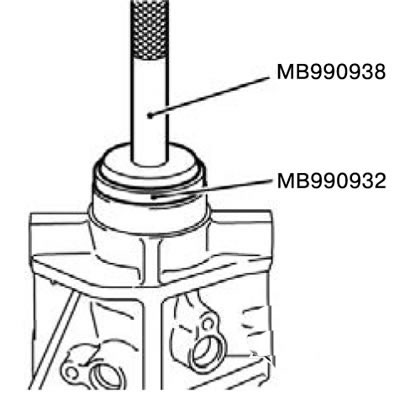
55. Install the oil seal (14).
1) Install the oil seal in the rear cover using the special tools MB990938 and MB990932.
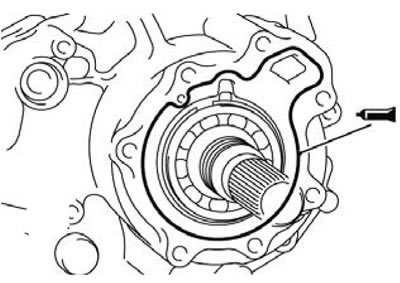
56. Install the back cover (13).
1) Apply special grease to the chain cover as shown in the figure.
Special grease: Mitsubishi Part No. MD997740 or equivalent.
57. Install the main shaft rack (12).
58. Install the sealing ring (11).
59. Install the shift drive (U).
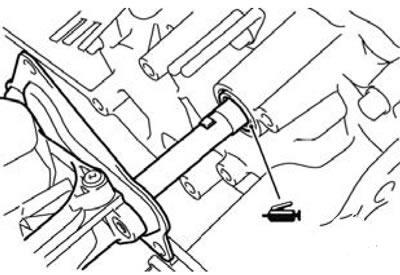
60. Install the sealing ring (9).
1) Apply special grease to the sealing ring.
Special grease: Mitsubishi Part No. 0101011 or equivalent.
61. Install the front output shaft speed sensor (8).
62. Install the sealing ring (7).
63. Install the rear output shaft speed sensor (6).
64. Install the sealing ring (5).
65. Install the vehicle speed sensor (4).
66. Install the dust seal guard (3).
67. Install the dynamic shock absorber (2).
68. Install the shift shaft drive gear (1).
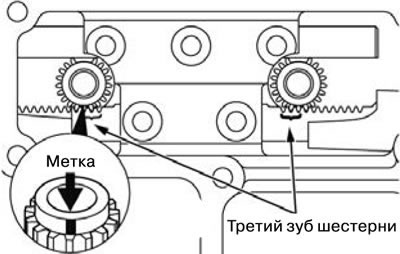
1) Install the shift shaft pinion so that its marked tooth meshes with the third gear slot on each shift shaft.