



Removal the front differential mount
1. Remove the engine crankcase guard.
2. Drain the oil from the differential.
3. Remove the drive shaft.
4. Remove the inner shaft.
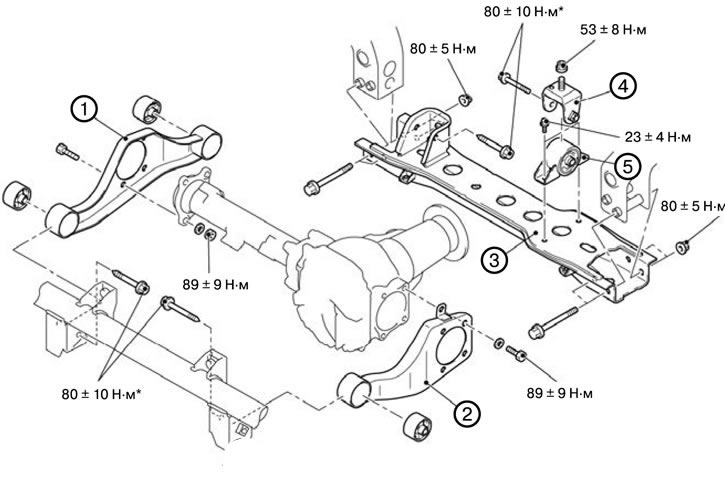
5. Remove the right differential mounting bracket (1).
6. Remove the left differential mounting bracket (2).
7. Remove crossbar No. 2 (3).
8. Remove the differential support bracket (4).
9. Remove the differential cup and differential housing assembly.
10. Remove the rear differential mounting bracket assembly (5).
Installing the front differential mount
Caution: * Indicates parts that must be pre-tightened and then finally tightened with the unloaded vehicle on its wheels on a level, flat surface.
Note: When installing, tighten the bolts to the torques shown in the figure.
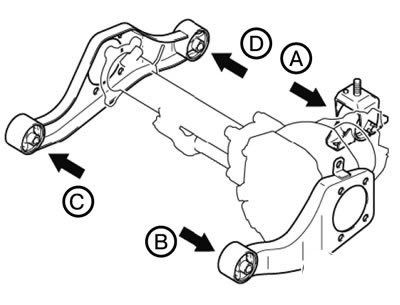
1. Install the rear differential mounting bracket assembly (5).
Caution: Tighten the bolts only when the wheels are in full contact with the ground.
1) Tighten the bolts in the order A, B, C, D or A, C, B, D as shown in the figure to the recommended tightening torque.
Tightening torque: 80±10 Nm.
2. Install the differential cup and differential housing assembly.
3. Install the differential support bracket (4).
4. Install cross beam No. 2 (3).
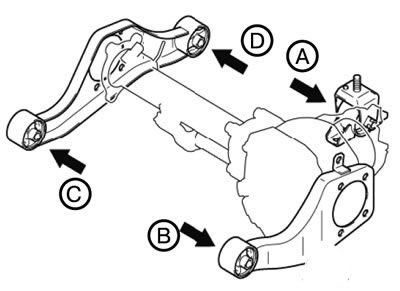
5. Install the left differential mounting bracket (2).
Caution: Tighten the bolts only when the wheels are in full contact with the ground.
1) Tighten the bolts in the order A, B, C, D or A, C, B, D as shown in the figure to the recommended tightening torque.
Tightening torque: 80±10 Nm.
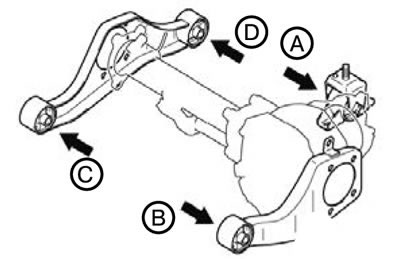
6. Install the right differential mounting bracket (1).
Caution: Tighten the bolts only when the wheels are in full contact with the ground.
1) Tighten the bolts in the order A, B, C, D or A, C, B, D as shown in the figure to the recommended tightening torque.
Tightening torque: 80±10 Nm.
[Article reprinted from the website: mitsubishiman.ru]
7. Install the inner shaft.
8. Install the drive shaft.
9. Fill the differential with oil.
10. Install the engine crankcase guard.