



Caution: * Indicates parts that must be pre-tightened and then finally tightened with the unloaded vehicle on its wheels on a level, flat surface.
Note: When installing, tighten the bolts to the torques shown in the figure.
1. Install cross beam No. 2 assembly (13).
2. Install the differential housing (12).
3. Install the left differential mounting bracket (11).
Caution: Tighten the bolts only when the wheels are in full contact with the ground.
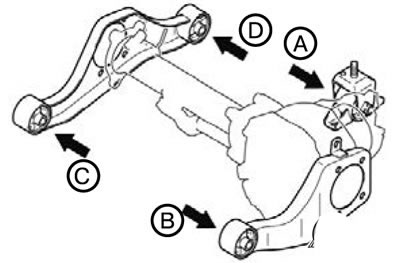
1) Tighten the bolts in the order A, B, C, D or A, C, B, D as shown in the figure to the recommended tightening torque.
The original material is posted on the website MitsubishiMan
Tightening torque: 80±10 Nm.
4. Install the overrunning clutch assembly (10).
5. Install the right differential mounting bracket and housing assembly (9).
Caution: Tighten the bolts only when the wheels are in full contact with the ground.
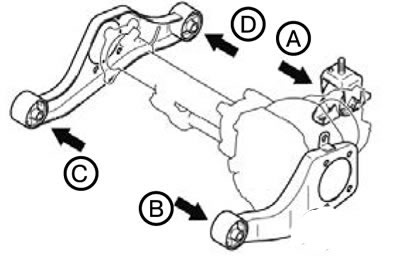
1) Tighten the bolts in the order A, B, C, D or A, C, B, D as shown in the figure to the recommended tightening torque.
Tightening torque: 80+10 Nm.
6. Install the gasket (8).
7. Install the overrunning clutch engagement switch (7).
8. Install the pin (6).
9. Install the bearing (5).
10. Connect the vacuum hose connection (4).
11. Tighten the bolt connecting the front frame and cross beam No. 2 as an assembly (3).
12. Connect the front frame joint and the differential bracket (2).
13. Connect the front propeller shaft joint (1).