



Contents: Removal ⤓ Installation ⤓
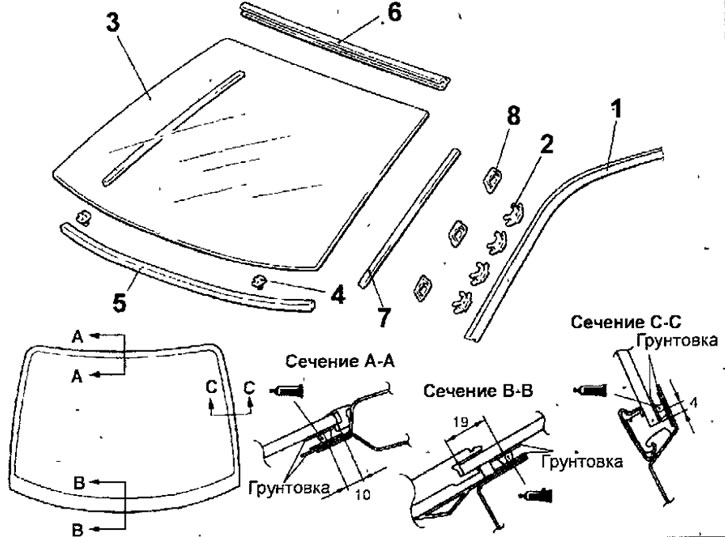
Fig. 17.9. Windshield: 1 - roof drainage molding; 2 - windshield retainer; 3 - windshield; 4 - windshield spacer; 5 - spacer; 6 - top molding; 7 - overlay; 8— retainer
Removal
- Remove the upper front pillar trims.
- Remove the roof water-draining moldings from both sides of the vehicle using a special tool (Fig. 17.10). If the molding is deformed, replace it.
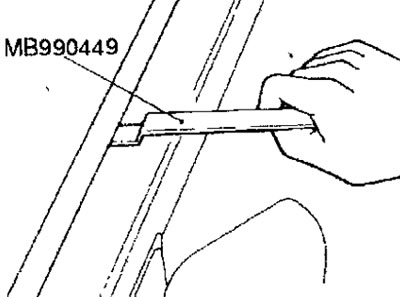
Fig. 17.10. Using a special tool to remove the roof drainage molding
- To protect the painted surfaces of the body from scratches and damage, cover them with fabric tape around the installed windshield.
- Using a sharp, thin drill, drill a hole in the glue layer and thread a steel wire through the hole.
- Using a steel wire like a hacksaw, saw through the adhesive layer around the entire perimeter of the glass (Fig. 17.11). The wire should not touch the edge of the windshield.
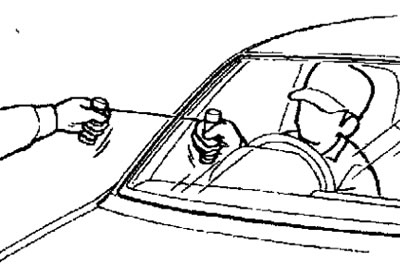
Fig. 17.11. Using a string to saw through the glue around the entire perimeter of the glass
- If the glass is to be reinstalled, apply alignment marks to the glass and body.
- Using a special tool, remove the windshield (Fig. 17.12).
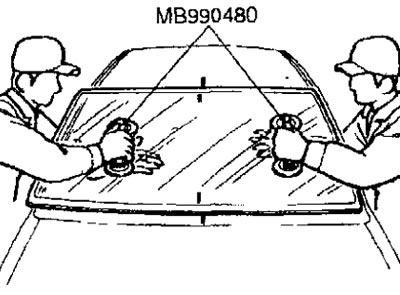
Fig. 17.12. Removing the windshield
- Use a knife to cut off the remains of the old glue around the entire perimeter of the body opening to a thickness of no more than 2 mm (Fig. 17.13).
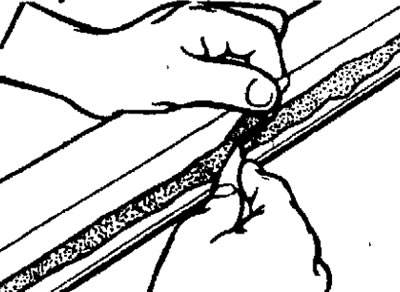
Fig. 17.13. Cutting off the remains of old glue around the entire perimeter of the body opening
- Use sandpaper to smooth the edges of the body opening flanging and remove any burrs.
- When reusing the windshield, remove the adhesive layer and clean the glass with isopropyl alcohol.
- Clean the body in the same way. After cleaning the surface of the adhesive layer, wait three minutes until it dries completely. Do not touch the cleaned surface.
Installation
- Install the spacer in the location shown in Figure 17.14.
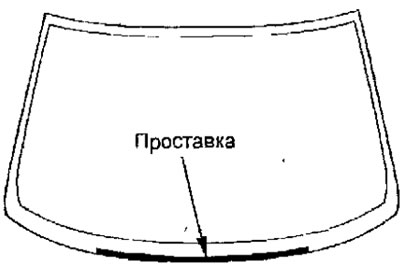
Fig. 17.14. Spacer installation location
- When replacing the windshield, temporarily install the windshield and use a special wax pencil to mark its position by drawing marks in 4 places on the glass and on the body.
- Clean the inside and outside of the windshield and body frame with isopropyl alcohol.
- Soak a sponge in primer and apply primer evenly to the windshield and body frame in precisely defined areas.
- After applying the primer, let the glass dry for 3-30 minutes. The primer increases the adhesion of the glue, so make sure to apply the primer evenly around the perimeter of the windshield and on the body frame. Keep in mind that a thick layer of primer will weaken the adhesive power of the glue. Never touch the surface of the primer with your hands. If this happens, the material may not bond properly to the glass, which will cause leaks and water leaks after the glass is installed.
- Fill the gun with glue. After 30 minutes of applying the primer, apply an even layer of glue around the perimeter of the glass. To make it easier to squeeze out the glue, cut the tip of the syringe at an angle, as shown in Figure 17.15.
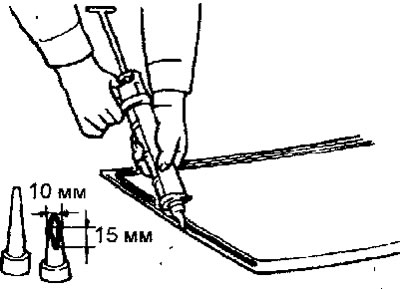
Fig. 17.15. Applying a layer of glue to the windshield
- Install the clamps onto the holders.
- Align the installation marks on the glass and the body opening and lightly press the glass evenly around the entire perimeter until it is completely glued.
- Use a spatula to remove any excess adhesive that has squeezed out and wipe the surface with isopropyl alcohol. Install the water drain molding until the adhesive has hardened. Try not to move the car until the adhesive has hardened.
- Wait at least 30 minutes and check the tightness of the adhesive joint. Use a stream of cold water, but be careful not to direct a strong stream of water at the new adhesive joint. Let the water run down the edges of the glass.
Warnings
- (1) Do not move the vehicle unless necessary.
- (2) When checking for leaks, do not pinch the tip of the water spray hose.
- If there are any leaks, dry the area being checked and then reapply adhesive.
- Install all previously removed elements.