



Caution: Removing the shock absorber from the coil spring assembly on vehicles equipped with Electronic Controlled Suspension (ECS) requires a special expensive tool to compress the spring, so leave this job to your dealer or any auto repair shop.
1. If the struts or coil springs show signs of wear (fluid leaks, loss of damping ability, dents, bending or cracks in the coil spring), all possible options must be investigated before any work is undertaken. The strut/shock absorber assembly is not serviceable and should problems occur, it is simply replaced with a new one.
Warning: Disassembling the strut assembly is a potentially dangerous operation that requires special care as serious hand injury may occur. Use only a high-quality spring compressor and carefully follow the manufacturer's instructions included with the tool. Once the spring is removed from the strut, set it aside in an isolated location (a steel box will do).
2. Remove the strut with the spring, following the description given in section 4. Secure the stand in a vice. Line the vice with wood or rags to prevent the stand from breaking, do not tighten the vice too much.
3. Install the spring compressor according to the instructions supplied with it onto the spring and compress it so as to relieve the pressure from the spring seat. This can be checked by rocking the spring seat.
4. Unscrew the piston rod nut, holding the spring seat from turning with large pliers.
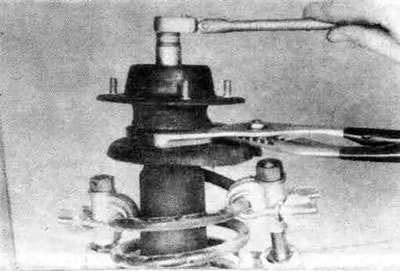
5.4. While unscrewing the rod nut, secure the washer to the spring seat with large pliers
5. Remove the insulator and upper spring seat from the piston rod. Check that the bearing in the insulator operates smoothly and replace the bearing if necessary.
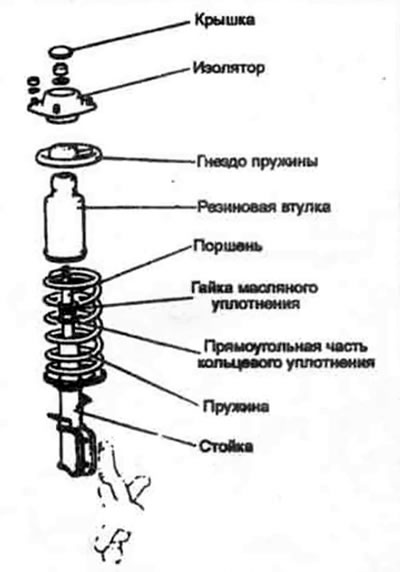
5.5a. Exploded view of the strut assembly with a coil spring
6. Carefully remove the compressed spring and place it in a safe place, a steel box will do.
Warning: Do not place your hands near the ends of the spring.
7. Slide the rubber buffer up the piston rod. Unscrew the oil seal nut and remove the seal.
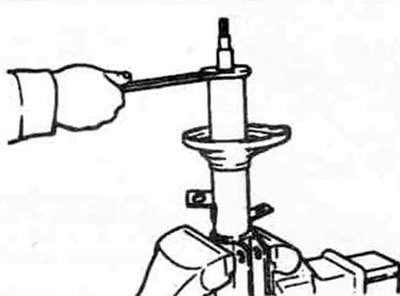
5.7. Unscrew the oil seal nut, then drain the liquid
(The text of the article was taken from the website: mitsubishiman.ru)
8. Remove the stand from the vice and drain the working fluid from it into the prepared container.
9. Re-clamp the post in a vice and remove the O-ring from the housing. Remove the piston rod from the post.
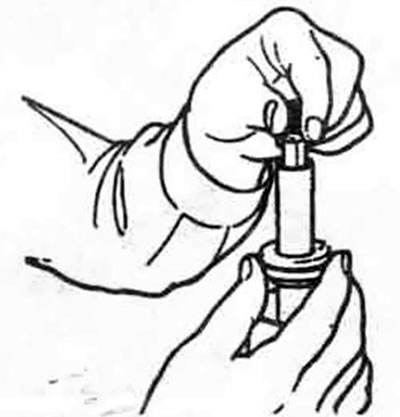
5.9 Remove the O-ring from the strut housing
10. Wash the strut tube with solvent and dry with compressed air. If the old rod is to be installed, wash it as well.
11. Wet the shock absorber cylinder and piston with clean shock absorber fluid. Install the piston into the shock absorber cylinder. Install the cylinder and piston into the strut tube, wetting all parts with shock absorber fluid.
12. Fill the strut tube with shock absorber fluid. Do this slowly, raising and lowering the piston so that all the air comes out from under the piston.
13. Place the piston guide onto the rod with the flange facing up.
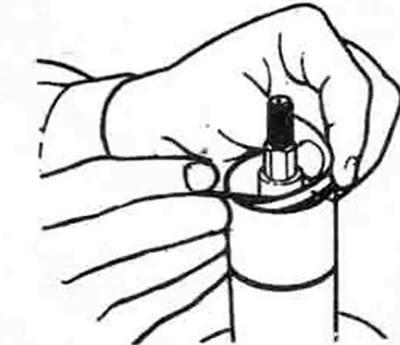
5.13. Lubricate the piston rod and install the guide with the flange facing up
14. Install a new O-ring between the piston guide and the strut tube.
15. Wet the lips of the oil seal and the threads of the oil seal nut with shock absorber fluid, then install the nut. Tighten the nut securely.
16. To check correct operation, raise and lower the shock absorber rod several times.
17. Pull the shock absorber rod out completely. Start assembling the strut with the rubber buffer, coil spring and upper spring seat. Make sure the spring is installed correctly and the flat side of the hole in the spring seat mates with the flat side of the piston rod.
18. Install the insulator and new piston rod nut, tightening it to the torque specified in specifications of this Chapter. Remove the spring compressor.
19. Install the strut and spring assembly to the vehicle as described in section 4.