



Disassembly
1. Unscrew the guide pin mounting bolts and remove the caliper from the caliper bracket (Fig. 15.58). Remove the brake pads.
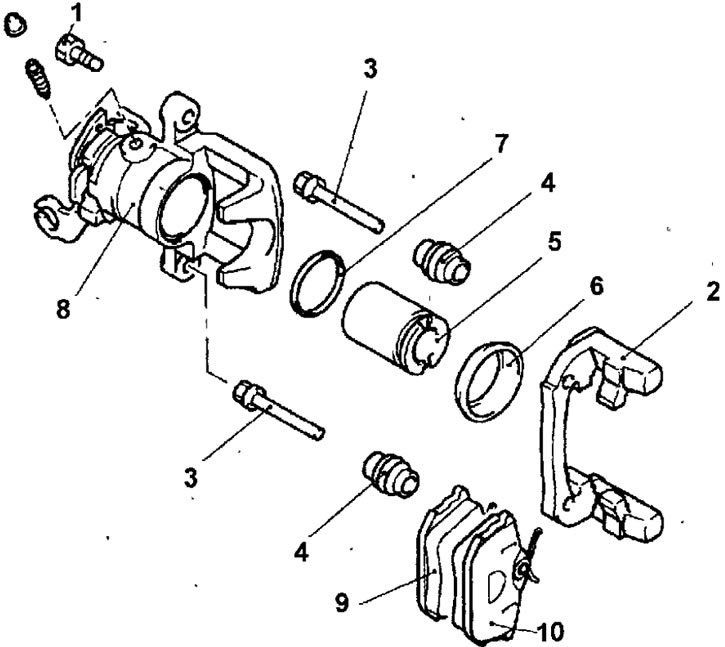
Fig. 15.58. Rear disc brake caliper: 1 - bolt; 2 - caliper bracket; 3 - guide pin: 4 - protective cover; 5 - piston; 6 - piston protective cover; 7 - piston sealing ring; 8 - support; 9 - brake pad with wear indicator; 10-brake shoe
2. Remove the protective covers and guide pins.
3. Remove the piston (Fig. 15.59). To do this, place a wooden block between the piston and the outer part of the caliper body. To remove the protective cover and piston, apply compressed air to the hole for the brake hose.
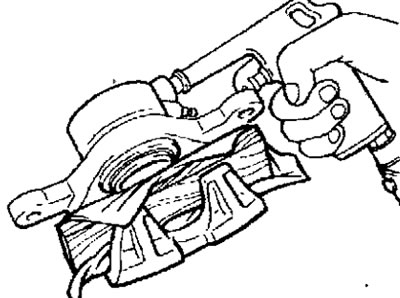
Fig. 15.59. Removing the piston from the caliper
Warnings
- If you force air into the brake cylinder body, the piston will fly out, damaging the caliper body. Pump compressed air gradually. When pushing the piston out with compressed air, do not place your fingers in front of the piston.
- Be careful, as the brake fluid will be blown out of the channel by the compressed air along with the piston.
4. Remove the piston protective cover.
5. Use your finger to remove the piston sealing ring (Fig. 15.60).
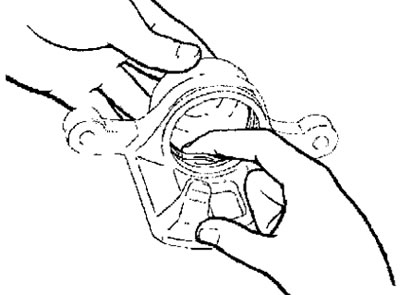
Fig. 15.60. Removing the piston sealing ring
Warning: Do not use a screwdriver or similar metal tools to remove the piston seal from the caliper cylinder, as they may damage the cylinder walls.
6. Clean the piston and cylinder surfaces with trichloroethylene, alcohol, or recommended DOT3 or DOT4 brake fluid.
Examination
1. Check the caliper cylinder for wear, damage or rust.
2. Check the piston surface for wear, damage or rust.
3. Check the caliper body and bushings for wear.
4. Check for damage or oil on the brake pad linings and for damage on the metal bases of the pads.
5. Check the thickness of the brake pad friction linings and, if necessary, replace the brake pads. Be sure to replace all the pads on one axle of the car, even if only one pad is worn out.
If the brake pads are to be reinstalled, they must be marked before removal.
Assembly
1. Assembly is carried out in the reverse order of removal, taking into account the following.
2. Before installing the guide pins, apply grease from the repair kit to the working surface of the pin and to the hole in the caliper bracket into which the pin enters (Fig. 15.61).
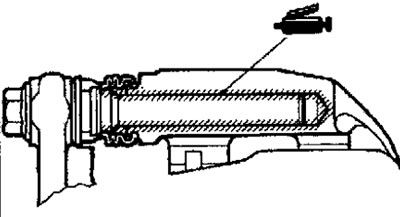
Fig. 15.61. Places where grease from the repair kit is applied to the guide pins during caliper assembly