



Removal
- Raise the vehicle and remove the cross member.
- Loosen the self-locking nut and remove the rubber bushings and the sleeve securing the anti-roll bar to the lower arm of the front suspension (Fig. 14.37).
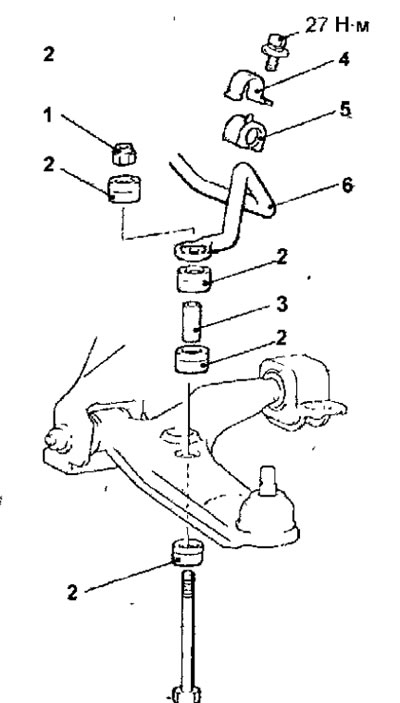
Fig. 14.37. Anti-roll bar: 1 - self-locking nut; 2 - rubber bushings for mounting the anti-roll bar; 3 - sleeve; 4 - clamp; 5 - bushing; 6 - anti-roll bar
- Remove the bolts and clamps securing the anti-roll bar bushings.
- Remove the anti-roll bar from the vehicle.
Examination
- Check the bushing for wear and deterioration.
- Check the anti-roll bar for bending or damage.
Installation
- Installation is carried out in the reverse order of removal, taking into account the following.
- Position the stabilizer so that the identification mark is on the right side, then install the bushing so that the alignment mark is positioned as shown in Figure 14.38.
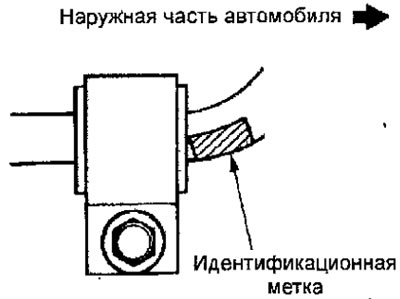
Fig. 14.38. When installing the stabilizer, the identification mark should be on the right side
- Install the anti-roll bar and tighten the self-locking nut so that the anti-roll bar mounting bolt protrudes above the nut as shown in Figure 14.36.
The protrusion of the stabilizer mounting bolt protruded above the nut: 22 mm