



Contents: Removal ⤓ Installation ⤓
Removal
1. Disconnect the wires and remove the battery and shelf. Remove the air filter.
2. Raise the vehicle and support it on supports.
3. Drain the automatic transmission fluid.
4. Remove the torque converter housing.
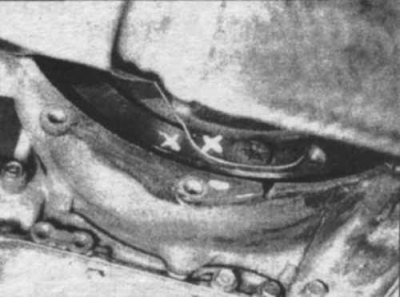
8.5 Mark the installation position of the torque converter on the drive disc with white paint
5. Mark the installation position of the torque converter on the drive disc using white paint (8.5).
6. Unscrew the three bolts securing the torque converter to the drive disk.
7. Remove the starter.
8. Disconnect the axle shafts from the gearbox.
9. Disconnect all vacuum hoses, wires and cables from the transmission.
10. Install supports under the engine and gearbox.
11. Remove the suspension components that interfere with the removal of the gearbox.
12. Remove the bolts securing the gearbox to the engine.
13. Loosen the nuts and bolts and disconnect the gearbox mount.
14. Lower the gearbox slightly, disconnect and plug the cooling system pipes.
15. Move the gearbox away from the engine and remove it from the vehicle.
Installation
16. Before installation, check that the torque converter hub is securely seated in the pump.
17. Raise the transmission into place and connect the coolant hoses.
18. Rotate the torque converter so that the mounting bolt holes align with the marks made earlier.
The material was created based on the website [mitsubishiman]
19. Install the gearbox onto the engine.
20. Install the transmission-to-engine mounting bolts and tighten them securely. Install the transmission mount.
21. Insert the torque converter mounting bolts to the drive disk and tighten them to the required tightening torque.
22. Install all previously removed components and tighten the bolts and nuts to the required tightening torque.
23. Fill the automatic transmission fluid and road test.