Contents: Disassembly ⤓ Assembly ⤓
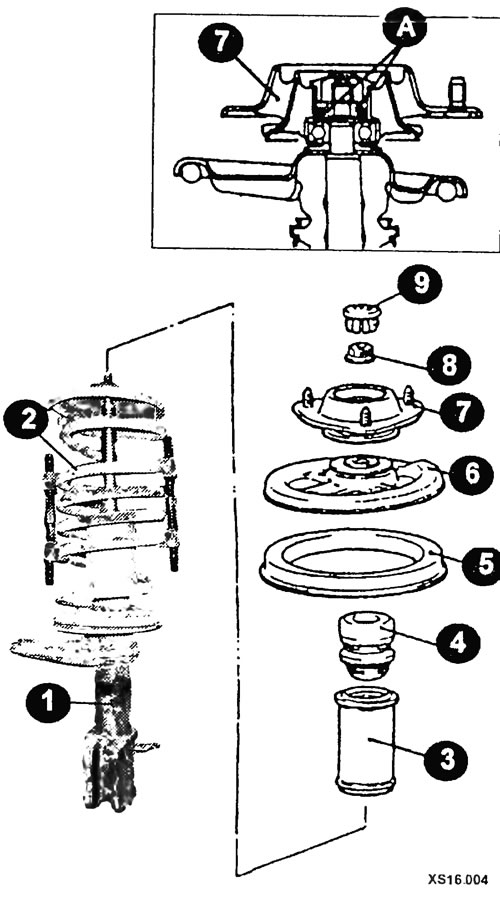
Typical elements of the front suspension shock absorber strut
1 - stack; 2 - spring; 3 - protective cover; 4 - compression stroke buffer; 5 - spring lining; 6 - upper spring plate; 7 - rack support (bumper); 8 - nut; 9 - lid; A - lubrication point.
Disassembly
Remove the dust cover.
Place the front rack in a vice.
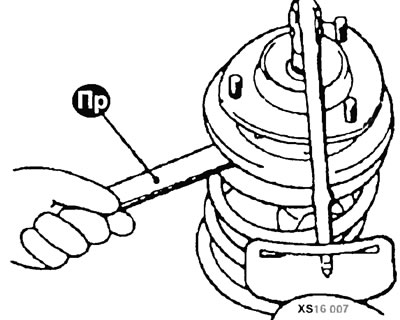
Using a special device, compress the spring so that it moves away from the top. When using a spring compressor, make sure that the spring coils are firmly grasped and compress the spring from opposite sides.
Hold the upper spring cup with a special key and loosen the nut.
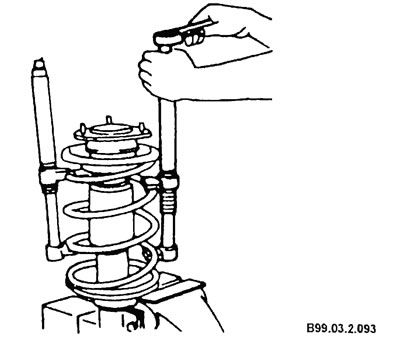
Remove the strut damper support.
Remove the top cup and spring cover.
Remove the compression stroke buffer.
Remove the protective cover.
Remove the spring.
Remove the spring compressor.
Check the shock absorber components.
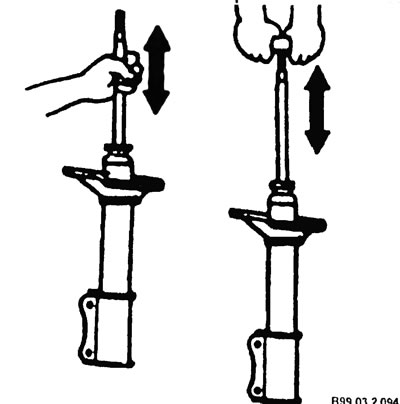
Shock absorber
Check the smoothness of the piston rod movement under full compression and extension. Make sure there are no oil leaks through the piston rod seal and welds.
The rod should not have deformations, cracks or other damage. If necessary, replace or repair the shock absorber.
The original article is on the website mitsubishiman.ru
Upper support of the rack
There should be no cracks or other signs of damage on the rubber elements. The rubber should not peel off.
Thrust bearing
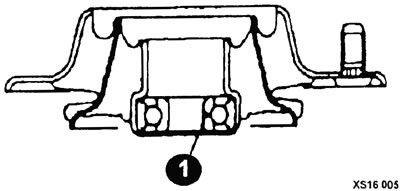
When the bearing rotates, there should be no extraneous noise or excessive axial play. Replace the bearing (1) if necessary.
Coil spring
Check the spring for deformation, cracks and other damage. Replace the spring if necessary.
CAUTION: The springs on the front suspension must be of the same class.
When installing, the spring must be installed as shown in the photo.

Assembly
Assembly is carried out in reverse order, taking into account the following:
After compressing the coil spring, use a special device to pre-tighten the self-locking nut.
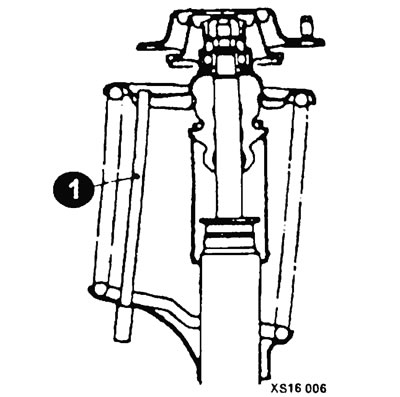
Align the holes in the lower and upper strut spring support cups (some models). This job is easily accomplished using a length of pipe (1) as shown in the figure.
Correctly align both end coils of the spring with the grooves in the upper and lower cups, and then loosen the spring compressor.
Tighten the self-locking nut to the specified torque using the fixture.