



Contents: Disassembly ⤓ Assembly ⤓
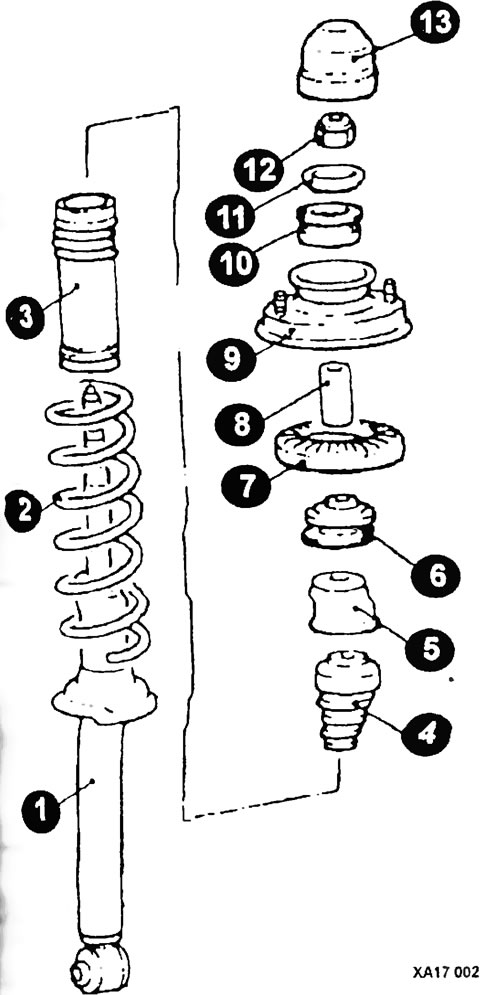
Shock absorber strut elements
1 - shock absorber; 2 - spring; 3 - protective cover; 4 - buffer; 5 - shock absorber cup; 6 - upper bushing "A"; 7 - upper spring cup; 8 - sleeve; 9 - upper support of the rack; 10 - upper bushing "B"; 11 - washer; 12 - nut; 13 - protective cap.
Disassembly
Using a screwdriver blade as a lever, remove the protective cap.
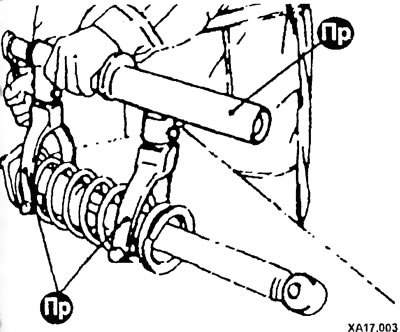
Using the device, compress the spring so that it moves away from the top. When using a special device for compressing springs, make sure that the spring coils are firmly grasped and compress the spring from opposite sides.
Secure the shock absorber rod with a wrench to prevent it from turning and, using a second wrench, unscrew the shock absorber rod mounting nut.
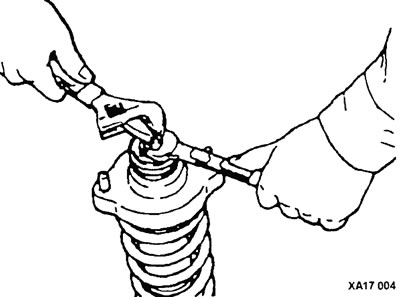
After removing the washer, remove the upper bushing "B" .
Remove the upper support of the rack.
Remove the upper spring cup.
Remove the upper bushing "A".
Remove the shock absorber sleeve, cup, protective cover, and compression stroke buffer.
Using the spring compressor, remove the spring.
Check the smoothness of the rod movement during full compression and extension. The rod should move without jerking or jamming.
CAUTION: The rear shock absorber must have a greater extension force (A) than compression force (B).
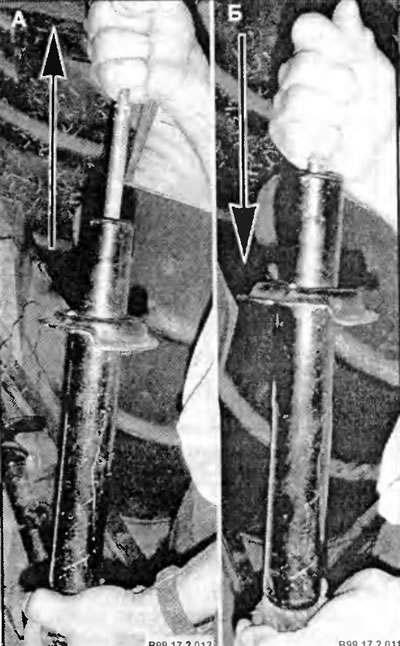
Check for oil leaks through the stem seals and welds. The stem should not be deformed or damaged.
Assembly
If installing a new spring, compress it with the tool and install it on the shock absorber.
Align the lower coil of the spring with the notch in the spring seat.
Install the compression buffer protective cover, then align the upper coil of the spring with the recess in the upper cup and install the cup.
Install the sleeve, upper bushing "A" and upper spring cup.
Install the upper strut support so that the axis of the lower shock absorber bushing (1) coincides with the line between the upper strut mounting bolts when viewed from above.
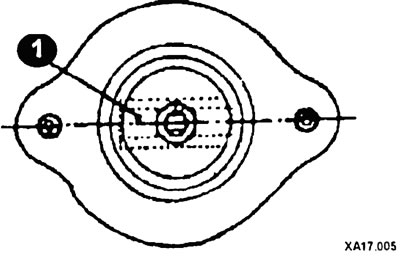
Screw on and pre-tighten the self-locking nut.
Remove the special spring compressors and tighten the self-locking nut completely.
CAUTION: Do not use an impact wrench when tightening the special tool bolt.