



Removal
1. Mark the direction of rotation of the timing belt to facilitate its reinstallation (Fig. 2.3).
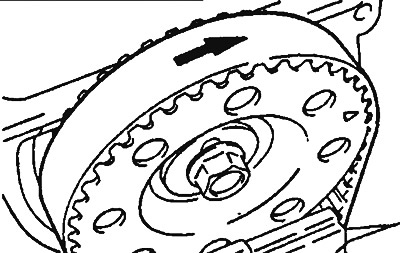
Figure 2.3. Mark the direction of rotation of the timing belt
Examination
2. Replace the timing belt if the following defects are found:
- hardened rubber on the outside of the belt. If the outside of the belt is shiny, inelastic and so hard that no marks are left on it when pressed firmly with a fingernail (Figure 2.3a);
- cracks 2 in the rubber on the outside of the belt (Figure 2.36);
- cracks 3 or delaminated material;
- cracks 4 at the base of the tooth;
- 5 cracks on the sides of the belt.
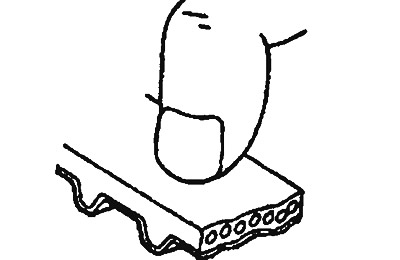
Figure 2.3a. Hardened rubber on the outside of the belt | 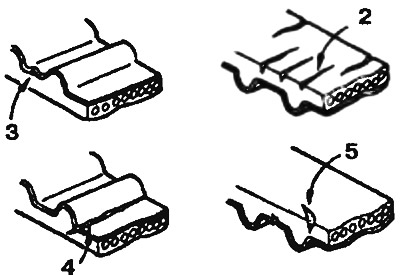
Figure 2.3b. Defects of the toothed belt drive: 1 - Cracks in the rubber on the outside of the belt; 3 - Cracks or peeling of material; 4 - Cracks at the base of the tooth; 5 - Cracks on the sides of the belt. |
Installation
3. Set the mark on the camshaft pulley 1 opposite the mark on the cylinder head 2, the mark on the crankshaft pulley 1 opposite the mark on the power steering pump housing 2 (Figure 2.4a, b).
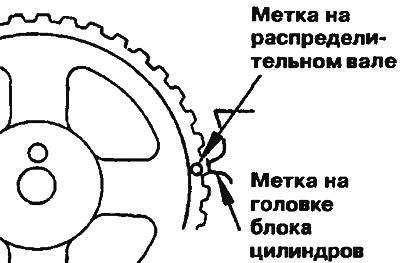
Figure 2.4a. Align the mark on the camshaft pulley with the mark on the cylinder head | 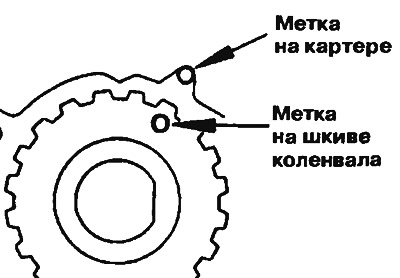
Figure 2.4b. Place the mark on the crankshaft pulley opposite the mark on the power steering pump housing |
4. Place the toothed belt on the crankshaft pulley 3, keeping the tension side 2 taut, and then place the belt on the camshaft pulley 1 (Figure 2.5).
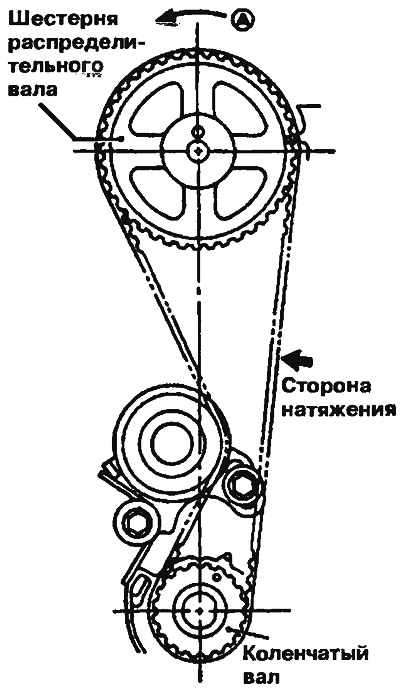
Figure 2.5. Place the timing belt on the crankshaft pulley, keeping the tensioned side taut, and then place the belt on the camshaft pulley
5. Loosen tensioner mounting bolts 1 and 2 and tighten the belt using the spring. Make sure that the belt is completely seated in the pulley grooves. Check the direction of the timing marks on the pulleys (Figure 2.6).
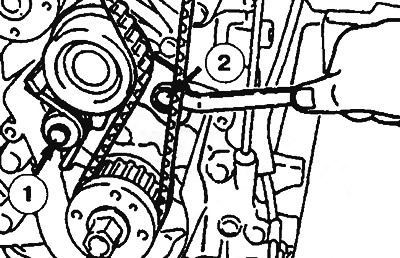
Figure 2.6. Loosen bolts 1 and 2 of the tensioner and tighten the belt using the spring
6. Rotate the crankshaft three teeth clockwise (Figure 2.7).
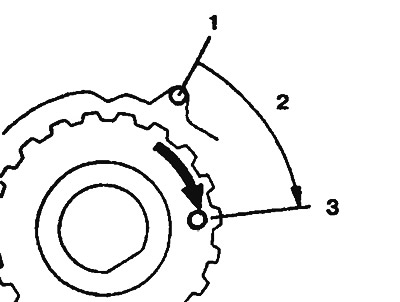
Figure 2.7. Rotate the crankshaft three teeth clockwise. 1 - Mark on the power steering pump housing; 2 - Three-prong turn; 3 - Mark on the crankshaft pulley.
1. Never tighten bolt 1 first, as the tensioner will rotate with the bolt when tightening, which will result in excessive belt tension (Figure 2.8).
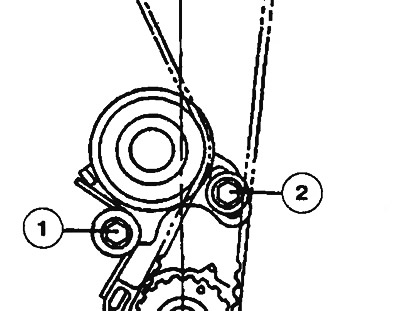
Figure 2.8. Tighten bolt 2 first and then 1
8. Check the belt tension. Squeeze the tensioner and belt with your hand and press the tensioner towards the belt. Make sure that the belt teeth are 1/4 immersed in the tensioner bolt (Figure 2.9).
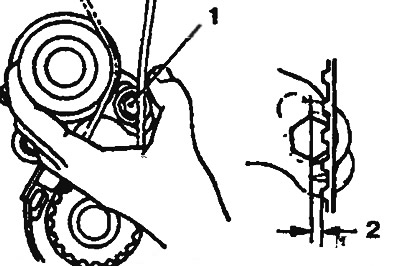
Figure 2.9. Squeeze the tensioner and belt with your hand and press the tensioner towards the belt. Make sure that the belt teeth are 1/4 immersed in the tensioner bolt: 1 - Belt tensioner bolt; 2 - 1/4 bolt head.