



Examination
1. In most cases, the rear wheel bearings do not require maintenance until the brake pads need replacing. However, the bearings should be checked whenever the car is raised for any reason. This procedure requires a torque wrench and special grease.
2. With the vehicle supported on stable stands, rotate the wheels, paying attention to noise, binding and play.
3. Grasp the top and bottom of the tire with your hands. Move the wheel in and out. If there is noticeable play, the bearings should be checked and packed with grease or replaced.
Lubrication
4. Remove the wheel
5. If necessary, release the parking brake adjuster (see Chapter 9).
6. Using a screwdriver or chisel and hammer, remove the dust cover from the drum/hub.
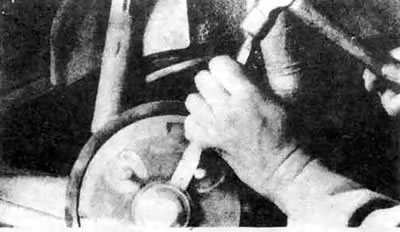
32.6. Remove the dust cover from the hub
7. Straighten the bent ends of the cotter pin and remove it from the nut lock. Use a new cotter pin when reassembling. Remove the nut retainer.
Note: If the cotter pin is missing, the vehicle is equipped with a self-locking nut.
8. Unscrew the trunnion nut and remove the washer.
9. Pull the drum/hub out slightly, then move it back to its original position. This will disengage the outer bearing from the spindle and it can then be removed.
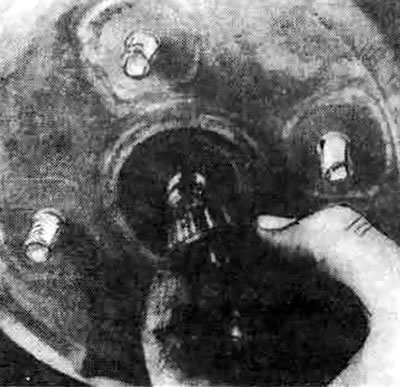
32.9. Remove the outer wheel bearing by first pulling the drum/hub outward a little
10. Remove the drum/hub from the journal.
11. Using a seal puller or screwdriver, remove the seal from the rear of the drum/hub. Pay attention to how the seal is installed.
12. Remove the inner wheel bearing from the drum/hub.
13. Using solvent, remove all traces of old grease from the bearing, hub and journal. You can use a small brush for this; when doing this, make sure that the brush bristles do not remain on the bearing rollers. Dry the parts in the air.
14. Carefully inspect the bearings and make sure there are no cracks, tarnish, wear on the rollers, etc. Check the condition of the bearing races inside the hub. If the races are damaged, the hubs should be taken to a mechanical workshop, where they can remove the old races and press in new ones. Please note that the bearings and races are supplied matched to each other, so you cannot install old bearings in new races.
15. Use special grease to lubricate the bearings. Place the grease in the bearings, pressing it between the rollers, cone and separator from the rear side.
16. Apply a thin layer of grease to the journal, outer bearing seat, inner bearing seat, flange and seal seat.
17. Apply a small amount of grease to the inside of the hub race. To prevent the grease from being squeezed out of the bearing, cover the hole with your finger.
18. Install the greased inner bearing into the rear of the drum/hub and apply a little more grease to the outer surface of the bearing.
19. Install the new seal over the inner bearing and press it in with a hammer and block of wood until it is flush with the hub.
20. Carefully install the drum/hub onto the journal and insert the outer bearing, packed with grease, into the hub.
Adjustment - crown nut
Note: If a self-locking nut is used, install a new one and tighten it to the torque specified in the specifications in this chapter, then proceed to step 27.
21. Install the washer and nut on the trunnion. Tighten the nut slightly (no more than 16 Nm).
22. Rotate the drum/hub forward to seat the bearings and remove excess grease and burrs that may cause premature bearing wear.
23. Check that the tightening torque of the trunnion nut remains the same - 16 Nm.
24. Loosen the trunnion nut, but do not unscrew it.
25. Tighten the nut to 6-10 Nm. Install the nut lock and insert a new cotter pin through the hole in the journal and the slots in the nut lock. If the slots do not align, loosen the nut slightly. The nut must not be loosened to install the cotter pin more than on the pop plane.
26. Bend the ends of the cotter pin flush with the nut. Trim off any excess cotter pin that may interfere with the dust cover.
27. Replace the dust cover by pressing it in place with a hammer and a metal rod.
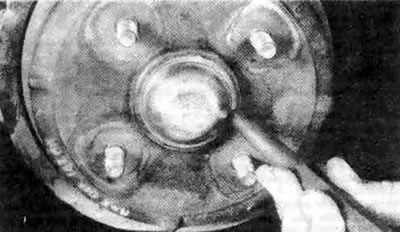
32.27. Install the dust cover in place using a metal rod and hammer, working around the periphery
28. Install the wheel on the hub and tighten the mounting nuts.
29. Holding the wheel by the top and bottom, check the bearings in the same way as described earlier in this section.
30. Lower the car.