
English Русский
Български
Беларускі
Український
Српски
Hrvatski
Română
Polski
Slovenský
Magyar
Articles Bookmark Contacts Sitemap   
Company Audi Company Ford Company Hyundai Company Kia Company Mazda Company Mercedes-Benz Company Nissan
MitsubishiMan.ru


Home Colt Lancer Galant L200 Outlander Pajero Others
Galant 6 and 7 (1987-1998) Galant 5 (1983-1989, petrol)

Drive shafts — removal and installation (Mitsubishi Galant 5)

  • Home
  • Galant
  • 5 (1983-1989, petrol)
  • Transmission
  • Clutch and drive shafts
  • Drive shafts — removal and installation
0
Contents: Removal ⤓ Installation ⤓

Removal


1. Apply the parking brake, remove the wheel cover and loosen the hub nut. Loosen the front wheel nuts, lift the car and place it on stable stands. Remove the front wheel.

2. Unscrew the drive shaft hub nut. To prevent the hub from turning, insert a pry bar between the two wheel mounting studs. Then unscrew the nut.

3. Unscrew the two bolts and separate the lower arm from the ball joint or the ball joint from the steering knuckle (see Chapter 10 if necessary).

4. Remove the drive shaft from the hub using a puller (if it is jammed), then pull the steering knuckle back and remove the outer end from the hub splines.
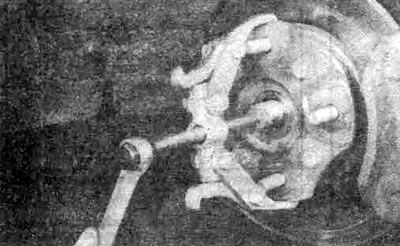


10.4a. If the drive shaft is jammed on the hub, a puller can be used to remove it; do not use a hammer
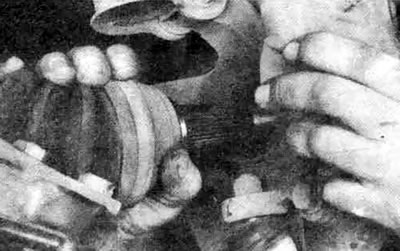


10.4b. Move the steering knuckle away and remove the drive shaft from the hub splines


5. Carefully pry the inner end of the drive shaft out of the transmission using a pry bar between the transmission housing and the CV joint housing.

6. Support the joint and carefully remove the drive shaft from the vehicle.
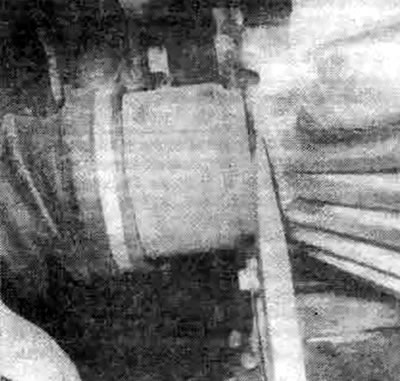


10.6. When removing the inner end of the axle from the gearbox, be careful (the seal is very close to the edge of the joint and can be damaged by a tire iron inserted too deeply)


Installation


7. Remove the old snap ring from the inner end of the drive shaft and install a new one. Lubricate the differential seal with multipurpose grease, lift the drive shaft into place, supporting the joints, and insert the splined end of the inner joint into the differential gear. Press the shaft into the gear by pressing firmly on the drive shaft.
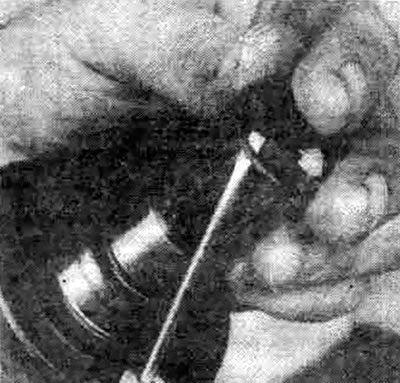


10.7 Always replace the spring washer on the inner constant velocity joint journal before installing the drive shaft


8. Apply a small amount of multi-purpose grease to the splines of the outer CV joint, pull the knuckle assembly and insert the stub into the hub.

9. Connect the ball joint to the lower arm or steering knuckle.

10. Install the hub nut, placing a new large washer underneath it. Secure the disc from turning and tighten the hub nut securely.

11. Clamp the inner CV joint housing (not the axle) and pull on it to check for secure mounting in the transmission.

12. Replace the wheel and lower the vehicle.

13. Tighten the hub nut to the torque specified in the specifications in this Chapter and reinstall the wheel cover.
This article is available at: russian, bulgarian, belarusian, ukrainian, serbian, croatian, romanian, polish, slovak, hungarian
This article was reviewed by: Vladimir Glazunov
Share with friends:
◀ Previous
Galant 5: Clutch and drive shafts
Next ▶

Drive shafts — general information and testing
Clutch hydraulic system — bleeding
Clutch slave cylinder — removal, overhaul and installation
Clutch Master Cylinder — Removal, Overhaul and Installation
Clutch cable — removal, installation and adjustment
Replacement of drive shaft covers and overhaul of constant velocity joint
Similar materials for other Mitsubishi models

➤ Checking the rubber seals of the drive shafts Mitsubishi Colt 4 and 5 (1991-2003)
➤ Checking the rubber seals of the drive shafts Mitsubishi Lancer 3 and 5 (1984-1992)
➤ Drive shafts — disassembly and assembly Mitsubishi L200 4 (2005-2014, diesel)
➤ Replacing the timing belt and balancer drive belt (4G64,… Mitsubishi Outlander 1 (2003-2008)
➤ Door locks with mechanical drive Mitsubishi Pajero 1 and 2 (1982-1999)
➤ Repair of drive shafts Mitsubishi Carisma (1995-2004)
Link in different formats to this article
Comments and feedback from visitors
No comments yet


Add up two numbers 11 + 42


Galant 6 and 7 (1987-1998) 
  • General information
  • Introduction to guide
  • User manual
  • Driving and operation
  • Maintenance
  • Power unit
  • Dismantling the engine
  • Engine overhaul
  • Cooling and heating
  • Power and exhaust systems
  • Engine electrical equipment
  • Engine management systems
  • Transmission
  • Mechanical gearbox
  • Automatic gearbox
  • Clutch
  • Drive shafts and transfer case
  • Chassis and running gear
  • Brake system
  • Car suspension
  • Steering
  • Body and interior
  • Exterior (external elements)
  • Interior (internal elements)
  • Doors, locks and windows
  • Electrical equipment
  • Equipment and devices
  • Wiring diagrams Galant
  • Wiring diagrams Mirage
  • Wiring diagrams Diamante
Galant 5 (1983-1989, petrol) 
  • General information
  • Troubleshooting
  • Maintenance
  • Power unit
  • Engine repair
  • Engine overhaul
  • Cooling and heating
  • Fuel and exhaust system
  • Engine electrical equipment
  • Reducing exhaust toxicity
  • Transmission
  • Manual gearbox
  • Automatic gearbox
  • Clutch and drive shafts
  • Chassis and running gear
  • Brake system
  • Car suspension
  • Steering
  • Body and interior
  • Exterior (external elements)
  • Interior (internal elements)
  • Doors, locks and windows
  • Electrical equipment
  • Equipment and devices
  • Electrical diagrams
MitsubishiMan.ru © 2018–2026 • Mobile version • Articles about Mitsubishi • Contacts • Sitemap: EN BG BY UA RS HR RO PL SK HU • Site search • Bookmark
Colt 2 and 3 (1983-1993) · Colt 4 and 5 (1991-2003) · Colt 5 (1995-2003) · Lancer 3 and 5 (1984-1992) · Lancer 9 (2000-2007) · Galant 5 (1983-1989) · Galant 6 and 7 (1987-1998) · L200 4 (2005-2014) · Outlander 1 (2003-2008) · Pajero 1 and 2 (1982-1999) · Pajero 4 (2006-2021) · Carisma (1995-2004) · Space Star (1998-2005) ·
This resource sets cookies 🍪 to avoid bothering you with repeated data entry.