



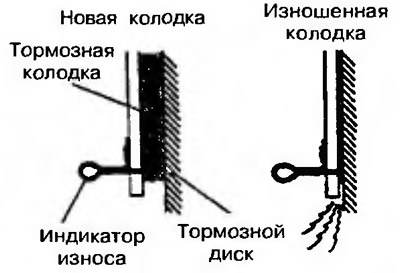
Figure 14.10. The left brake pad (inner) has a wear indicator. If the pad thickness is less than 2 mm, a squealing sound is heard as a warning while driving
1. Check the brake pad thickness through the hole in the caliper (arrow) (Figure 14.11). Nominal value: 10.0 mm. Limit value: 2.0 mm.
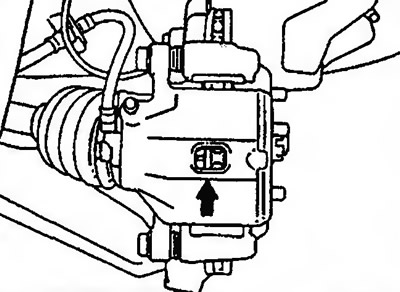
Figure 14.11. Check the thickness of the brake pad through the hole in the caliper (arrow)
Attention! If the value is below the maximum permissible value, the brake pads are changed on both sides together.
2. Remove the pin and secure the raised caliper to the car body with wire (Figure 14.12).
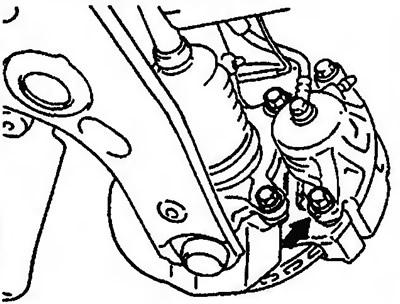
Figure 14.12. Remove the pin and secure the raised caliper to the vehicle with wire
3. Remove the following parts from the caliper support (Figure 14.13): 1. Brake pads (left and right) with wear indicator, 2. Brake pad, 3. Fasteners, 4. Outer plate.
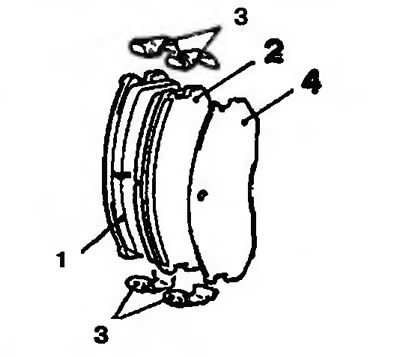
Figure 14.13. Remove the following parts from the caliper support: 1 - Brake pads (left and right) with wear indicator; 2 - Brake shoe; 3 - Fixators; 4 - Outer plate
The original article is on the website (MITSUBISHIMAN.ru)
4. Measure the hub torque without brake pads.
5. Install the brake pad and caliper and measure the brake slip torque.