
English Русский
Български
Беларускі
Український
Српски
Hrvatski
Română
Polski
Slovenský
Magyar
Articles Bookmark Contacts Sitemap   
Company Audi Company Ford Company Hyundai Company Kia Company Mazda Company Mercedes-Benz Company Nissan
MitsubishiMan.ru


Home Colt Lancer Galant L200 Outlander Pajero Others
Galant 6 and 7 (1987-1998) Galant 5 (1983-1989, petrol)

Checking the level of working fluid in an automatic transmission (Mitsubishi Galant 5)

  • Home
  • Galant
  • 5 (1983-1989, petrol)
  • General information
  • Maintenance
  • Checking the level of working fluid in an automatic transmission
0
Warning: The electric cooling fan may turn on at any time, even if the ignition is off. When working near the fan, turn off the power to the fan or disconnect the cable from the negative battery terminal.


1. The automatic transmission fluid level must be strictly maintained within the normal range. Low fluid level can cause slippage or loss of traction, and overfilling leads to foaming, fluid leakage and damage to the transmission.

2. The transmission fluid level should be checked only when the gearbox is at normal operating temperature.

Attention:
  • If the vehicle has just traveled a long distance at high speed or in hot urban weather, or if the vehicle has been towing a trailer, then an accurate measurement of the working fluid level is not possible.
  • Let the liquid cool for about 30 minutes.


3. Park the car on a level surface, apply the handbrake and start the engine. With the engine idling, press the brake pedal and move the transmission lever through all positions, starting and ending in the Park position.

4. With the engine still idling, remove the dipstick from its tube.
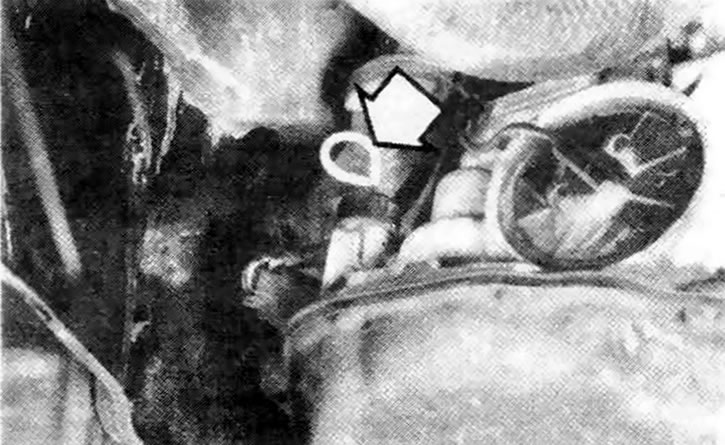


7.4. The dipstick for the automatic transmission fluid level gauge (arrow) is located next to the battery (view from under the car)


5. Wipe the fluid off the dipstick with a clean cloth and reinsert it into the tube until it stops.

6. Remove the dipstick again and determine the fluid level. The fluid level should be in the HOT zone. If the level is at the bottom of the zone, add the required grade of fluid through the dipstick tube using a funnel.

[The original material is posted on the website: mitsubishiman.ru]

7. Add liquid little by little and check the level each time.

8. Along with the level, you should also check the condition of the fluid. If the fluid at the end of the dipstick is black or dark brown, or if it smells like burning, then the fluid must be replaced (section 33). If you have any doubts about the condition of the fluid, buy some new fluid to compare the color and smell.
This article is available at: russian, bulgarian, belarusian, ukrainian, serbian, croatian, romanian, polish, slovak, hungarian
This article was reviewed by: Vladimir Glazunov
Share with friends:
◀ Previous
Galant 5: Maintenance
Next ▶

Checking the power steering fluid level
Checking the condition of the tires and their pressure
Checking the level of working fluids
Vehicle Maintenance Schedule
General information about adjustment
Changing engine oil and oil filter
Inspection and replacement of windshield wipers
Checking and adjusting the free travel of the clutch pedal (cable-actuated clutch)
Checking, maintaining and charging the battery
Checking, adjusting and replacing drive belts
Similar materials for other Mitsubishi models

➤ Checking the fluid level in the automatic transmission Mitsubishi Colt 2 and 3 (1983-1993)
➤ Checking the condition and level of the working fluid in… Mitsubishi Lancer 9 (2000-2007, petrol)
➤ Checking the fluid level in the automatic transmission Mitsubishi L200 4 (2005-2014, diesel)
➤ Checking the fluid level in the automatic transmission… Mitsubishi Outlander 1 (2003-2008)
➤ Automatic transmission fluid level Mitsubishi Pajero 1 and 2 (1982-1999)
➤ Checking the fluid level in the automatic transmission Mitsubishi Space Star (1998-2005)
Link in different formats to this article
Comments and feedback from visitors
No comments yet


Add up two numbers 36 + 16


Galant 6 and 7 (1987-1998) 
  • General information
  • Introduction to guide
  • User manual
  • Driving and operation
  • Maintenance
  • Power unit
  • Dismantling the engine
  • Engine overhaul
  • Cooling and heating
  • Power and exhaust systems
  • Engine electrical equipment
  • Engine management systems
  • Transmission
  • Mechanical gearbox
  • Automatic gearbox
  • Clutch
  • Drive shafts and transfer case
  • Chassis and running gear
  • Brake system
  • Car suspension
  • Steering
  • Body and interior
  • Exterior (external elements)
  • Interior (internal elements)
  • Doors, locks and windows
  • Electrical equipment
  • Equipment and devices
  • Wiring diagrams Galant
  • Wiring diagrams Mirage
  • Wiring diagrams Diamante
Galant 5 (1983-1989, petrol) 
  • General information
  • Troubleshooting
  • Maintenance
  • Power unit
  • Engine repair
  • Engine overhaul
  • Cooling and heating
  • Fuel and exhaust system
  • Engine electrical equipment
  • Reducing exhaust toxicity
  • Transmission
  • Manual gearbox
  • Automatic gearbox
  • Clutch and drive shafts
  • Chassis and running gear
  • Brake system
  • Car suspension
  • Steering
  • Body and interior
  • Exterior (external elements)
  • Interior (internal elements)
  • Doors, locks and windows
  • Electrical equipment
  • Equipment and devices
  • Electrical diagrams
MitsubishiMan.ru © 2018–2026 • Mobile version • Articles about Mitsubishi • Contacts • Sitemap: EN BG BY UA RS HR RO PL SK HU • Site search • Bookmark
Colt 2 and 3 (1983-1993) · Colt 4 and 5 (1991-2003) · Colt 5 (1995-2003) · Lancer 3 and 5 (1984-1992) · Lancer 9 (2000-2007) · Galant 5 (1983-1989) · Galant 6 and 7 (1987-1998) · L200 4 (2005-2014) · Outlander 1 (2003-2008) · Pajero 1 and 2 (1982-1999) · Pajero 4 (2006-2021) · Carisma (1995-2004) · Space Star (1998-2005) ·
This resource sets cookies 🍪 to avoid bothering you with repeated data entry.