



2. Turn the engine over.
3. Unscrew the main bearing cap bolts and remove the caps. Lay the caps out to ensure proper assembly.
4. Remove the old bearing shells from the cylinder block and main bearing caps. Wipe the bearing surfaces of the block and caps with a clean, lint-free cloth. They must be absolutely clean.
Checking the main bearing clearance
5. Clean the backs of the new main bearings and insert the bearings with the oil groove into the bearing bores in the cylinder block. Insert the other bearing shells into the corresponding caps. Make sure that the tabs of the bearings enter the grooves in the block and caps.
Caution: The lubrication holes in the block must align with the holes in the bearings. Do not hammer the bearings into place or scratch the bearing surfaces. No lubrication is used at this stage.
6. The inserts with thrust flanges must be installed in the central cover and the block bore (see Illustration 8.5).
7. Clean the bearing surfaces in the block and the crankshaft main journals with a clean, lint-free cloth.
8. Check and clean the oil holes in the crankshaft - otherwise all the dirt will go into the new bearings.
9. After checking the crankshaft for cleanliness, carefully place it on the main bearings.
10. Before final installation of the crankshaft, it is necessary to check the lubrication clearance of the main bearings.
11. Cut several pieces of Plastigage to the appropriate size (they should be slightly shorter than the width of the main bearings) and place one piece on each crankshaft main journal parallel to its axis (see illustration).
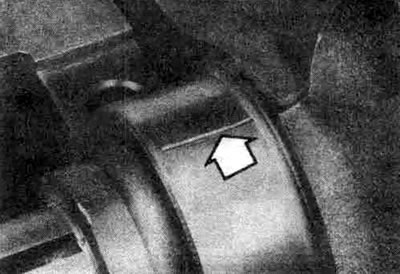
23.11. Place a strip of Plastigage (arrows) on the main bearing journals parallel to the crankshaft
12. Clean the bearing surfaces in the caps and install the caps in their old place (do not mix them up) with the arrows facing the front of the engine. Do not disturb the position of the Plastigage tape.
13. Starting from the center roof and moving to the sides, tighten the main bearing cap bolts to the required torque in three stages. Do not rotate the crankshaft during this operation.
14. Unscrew the bolts and carefully remove the main bearing caps. Lay them down one by one. Do not disturb the Plastigage or rotate the crankshaft. If some main bearing caps do not come off, tap them from side to side with a soft hammer.
15. Compare the width of the crushed Plastigage tape on each journal with the scale printed on the Plastigage envelope and determine the bearing clearance (see illustration). Compare the measured values with the specification.
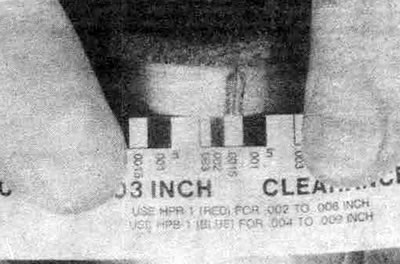
23.15. Determine the width of the crushed Plastigage tape to determine the crown bearing clearance (use the correct scale; (standard and metric scales included)
16. If the clearance is not within specification, the bearings may be the wrong size (replacement bearings are needed). Before deciding whether replacement bearings are needed, make sure there was no oil or dirt between the bearings and the block or cap when the clearance was measured. If the Plastigage is noticeably wider on one side than the other, the journal is tapered (see section 19).
17. Carefully remove all traces of Plastigage from the main journals and/or bearing surfaces. Use your fingernails to remove the tape, being careful not to scratch the bearing surfaces.
Final installation of the crankshaft
18. Carefully remove the crankshaft from the engine.
19. Clean the bearing surfaces in the block, then apply a thin, even coat of clean molybdenum-based grease or engine assembly grease. Also lubricate the thrust surfaces and the thrust bearing journal surfaces.
20. Check the cleanliness of the crankshaft journals, then install the crankshaft in its place in the block.
21. Clean the bearing surfaces in the caps and coat them with oil.
22. Install the covers in their appropriate positions with the arrows facing the front of the engine.
23. Replace the bolts.
24. Tighten all bolts except the thrust bearing cap bolts to specification (working from the center and performing final tightening in three stages).
25. Tighten the thrust bearing cover bolts to 14-16 Nm.
26. Tap the ends of the crankshaft on one side and the other with a lead or copper hammer to align the thrust surfaces of the main bearings and the crankshaft.
27. Tighten all main bearing cap bolts to the specified torque, starting with the center main bearing and working toward the edges.
28. On models with a manual transmission, install a new pilot bearing into the end of the crankshaft (see Chapter 8).
29. Turn the crankshaft a few revolutions to check that it rotates smoothly.
30. Check the crankshaft end play using a feeler gauge or micrometer as described in section 14. The axial clearance should comply with the norm if the thrust surfaces of the crankshaft are not worn or damaged and new liners are installed.
31. According to section 24 install the new rear seal in place, then attach the retainer to the cylinder block.