
Removing
Remove the cylinder head see point 1.8.
Remove intake and exhaust manifolds.
Attention: When reinstalling the valve control parts, they must be installed in their original places. In order not to confuse them, it is recommended to put the parts in order on a special board.
Remove the camshaft see point 1.9.
Attention: When removing the Jet valve (not available on all engines) make sure to insert the key without skew. Otherwise, the valve may break.
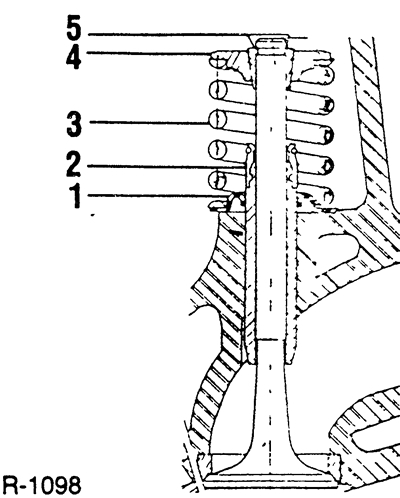
1 - lower plate of the valve spring,
2 - valve stem seal,
3 - valve spring,
4 - the upper plate of the valve spring,
5 - valve crackers.
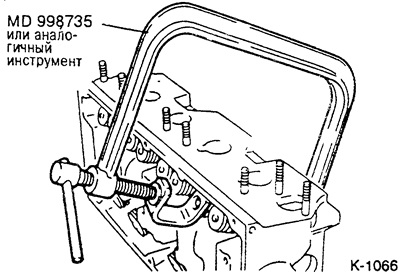
Remove all valves one by one. To do this, compress the valve spring with a special tool for compressing the springs and remove the cotters from the valve stem.
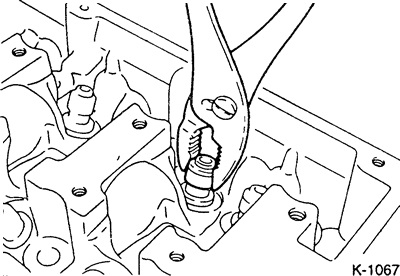
Pull out the valve seal with pliers. Old seals are often quite tight. In this case, it is recommended to use a punch, for example, HAZET 791-2
Pull the valve out of the combustion chamber.
Installation
Before installing the valves, check the valve guides and, if necessary, grind or lap the valves, see point 1.1.
Caution: New valve spring caps at the bottom edge of the cotter hole are often very sharp. This can damage the valve stems (scratches, etc.). Replace damaged valves, if necessary, sand the valve spring plates before installation.
Sand the valve stems in the contact surfaces with the crackers.
Lightly coat the valve stem and valve guide with engine oil and insert the valve. Do not confuse intake and exhaust valves!
Insert the lower spring cover.
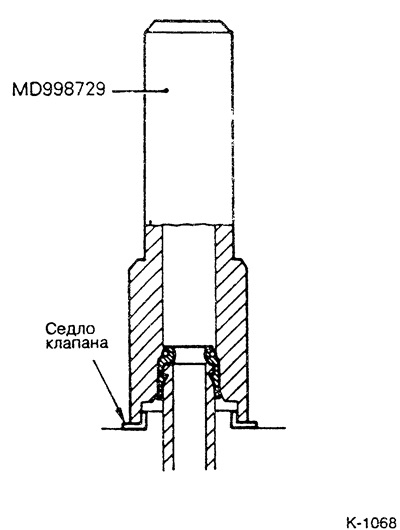
Lightly lubricate the new valve seal with engine oil and press in with a suitable drift to the stop. The picture shows a diesel engine with MD-998 729 assembly tool. For other engines in the workshop, the following tools are used MD-998760 12-valve engine, MD-998302 8-valve engine, MD-998729 Jet valve: MD-998308.
From a safety point of view, valve seals must be replaced.
Attention: To prevent damage to the seals of the valve stems, before installation, glue the surface of the valve stem to the crackers with a smooth adhesive tape. After installation, remove the tape. Otherwise, the valve stem seals may be damaged. In this case, the engine will have increased oil consumption.
Insert the valve spring and upper valve spring seat. Only install springs of the same wire diameter and length. The painted side of the valve spring must face the rocker arm.
Compress the valve spring with spring compressor pliers and insert the cotters so that they pop into the valve groove. Be careful not to damage the stem seal with the pliers when compressing the spring. Loosen the pliers and insert the next valve.
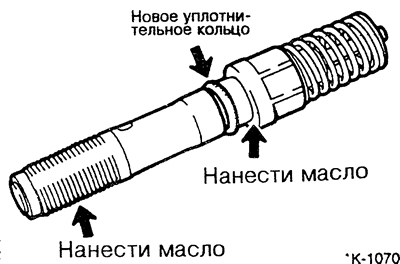
If it was removed, screw in the Jet valve by hand (not available on all engines). First, insert a new O-ring into the valve body and apply a little engine oil to the threads and seating surface (valve seat to cylinder head). Tighten the injector valve to 9 Nm. Make sure that the key is fitted without distortion, otherwise the valve may break off.
Install the camshaft see point 1.9.
Fit intake and exhaust manifolds with new gaskets and tighten alternately.
Replace cylinder head gasket, install cylinder head, see point 1.8.