



Contents: Removal ⤓ Installation ⤓
Removal
1. Remove the protective cover.
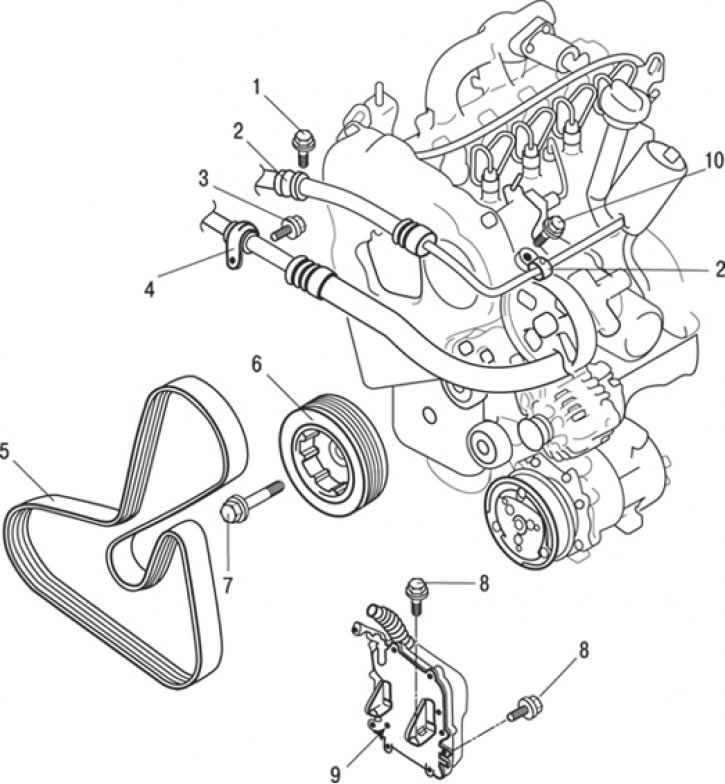
Fig. 5.4. Crankshaft pulley: 1 – bolt, 10 Nm; 2 – Power steering pressure hose clamp; 3 – bolt, 10 Nm; 4 – Air conditioner suction hose clamp; 5 – drive belt; 6 – crankshaft pulley; 7 – bolt, 20 Nm + (115 ±15)°; 8 – bolt, 25 Nm; 9 – Engine Control Unit ECU; 10 – bolt, 10 Nm
2. Loosen the bolts, remove clamp 4 (Fig. 5.4) of the air conditioner suction hose and remove the hose.
3. Loosen the bolts and remove the power steering pressure hose clamp.
4. Loosen the bolts, remove the engine control unit ECU and, without disconnecting the wires from it, move it to the side.
5. Loosen the automatic belt tensioner pulley mounting bolt.
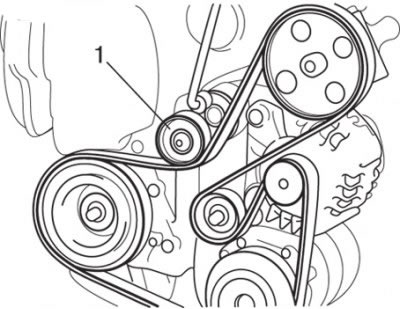
Fig. 5.5. Reducing the belt tension by turning the automatic tensioner (1) of the belt pulley clockwise using a 16 mm wrench
6. Place a 16mm wrench on the lug of the automatic belt tensioner pulley, turn the automatic belt tensioner pulley clockwise and remove the belt (Fig. 5.5).
Caution! The belt used to remove the pulley will be damaged. Do not use the standard engine accessory drive belt (use another belt).
Caution: Never install a damaged belt on the engine.
7. While holding the pulley from turning with special tool MD998747, unscrew the bolts and remove the crankshaft pulley.
Installation
Installation is carried out in the reverse order of removal, taking into account the following.
Secure the crankshaft pulley from turning as you did when removing it; tighten the pulley mounting bolt to a torque of 20 N·m and then turn it further by an angle of 115° ±15°.
(Original source of information: www.MitsubishiMan.ru)