

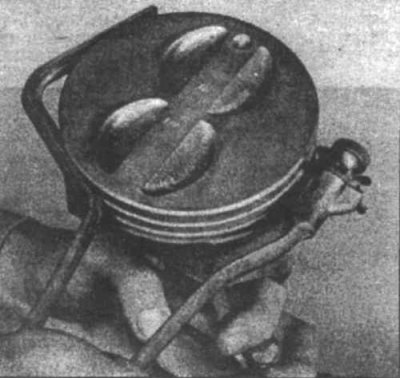
18.1 Use the special tool to remove the piston rings
1. Carefully remove the rings from the pistons (18.1), being careful not to scratch the pistons.
18.2a Piston grooves can be cleaned with a special tool
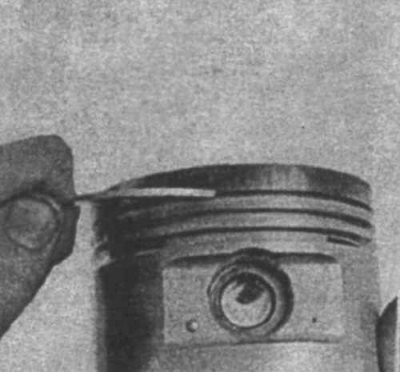
18.2b... or a fragment of a ring
2. Remove carbon deposits from the piston head. Clean the piston ring grooves (18.2a and 18.2b).
3. After removing carbon deposits and deposits, clean the pistons and connecting rods with a solvent and dry them.
4. Inspect the pistons for cracks in the piston skirt, around the piston pin and piston ring grooves.
5. Inspect the piston for scratches, corrosion, or burnt areas.
18.6 Check the ring backlash in several places using a set of feeler gauges
6. Measure the backlash of the piston rings at several points (18.6).
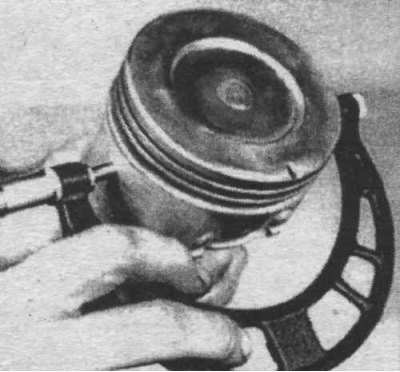
18.7 Measure the piston diameter perpendicular to and parallel to the piston pin
7. Determine the clearance between the piston and the cylinder walls by subtracting the cylinder diameter from the piston diameter. Measure the piston diameter 2 mm above the lower edge of the piston, perpendicular to and parallel to the piston pin (18.7). If the gap is too large,
8. Check up a backlash between the piston and a rod, having inclined the piston on a rod. If excessive play is felt, have the piston and connecting rod rebored and a new piston pin installed.
9. If the piston needs to be removed from the connecting rod, contact a specialist.
10. Inspect the connecting rods for cracks or other damage. Remove the connecting rod caps, clean them and inspect for scratches. Replace the bearing shells and reinstall the covers.