
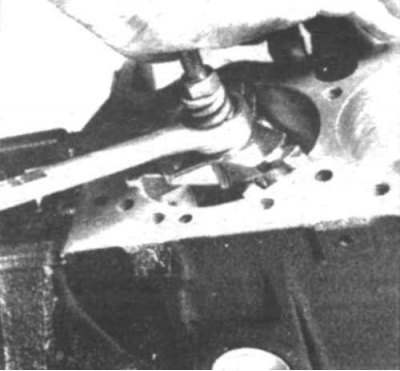
13.1 Removal of shoulder on top of cylinder requires special tool - remove shoulder before removing piston
1. Check for a shoulder at the top of the cylinder and remove it before removing the piston (13.1).
2. Turn over the engine.
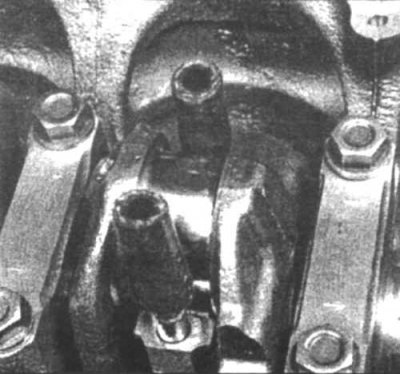
13.3 Check the end play of the connecting rod with a feeler gauge
3. Check the end play of the connecting rods using a set of feeler gauges (13.3). If it is too large, the connecting rod must be replaced. If it is too small, contact a specialist to turn the connecting rod or crankshaft.
4. Mark connecting rods and connecting rod caps.
5. Unscrewing the nuts of the covers half a turn, unscrew and remove them. Remove the connecting rod cover of the first cylinder and the liner.
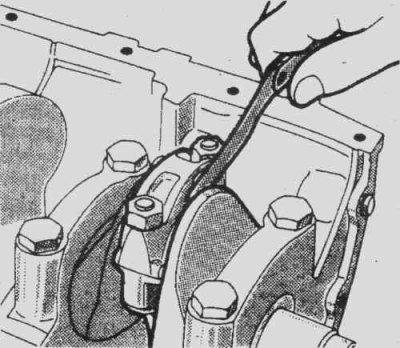
13.6 To protect the cylinder walls and the crankshaft journal, place pieces of rubber hose over the connecting rod bolts before removing the connecting rod
6. Put pieces of rubber or plastic hose on the cap bolts so as not to damage the cylinder walls and the crankshaft journal when removing the connecting rod (13.6).
7. Remove the top loose leaf and get the piston and a rod from above the engine.
8. Similarly remove other rods and pistons.
9. After removing the connecting rods, install the liners and covers in place and lightly tighten the fixing nuts.
10. Do not remove pistons from connecting rods.