



CAUTION: Before removing the pistons and connecting rods, remove the cylinder head.
Check with your fingernail whether a roller has formed at the upper limit of the piston ring stroke (approximately 5 mm below the top of the cylinder). If rollers have formed due to carbon deposits or wear of the cylinder walls, they must be completely removed using a special device. If the rollers are not removed, the piston may be damaged when removing the pistons with connecting rods.
Once the rollers have been removed, turn the engine over.
Loosen the mounting bolts and remove the oil pan with the gasket.
Remove the oil receiver.
Remove the oil pump (if necessary).
Before removing the connecting rods, check their side clearance using feeler gauges. Insert them between the first connecting rod and the crankshaft until all the play is removed. If the play exceeds the maximum repair value, then the connecting rods must be replaced. If new connecting rods or a new crankshaft are installed, the play may become less than the minimum permissible. In this case, the connecting rods must be machined - if necessary, consult a car repair shop. Repeat the procedure for the remaining connecting rods.
(The article is reprinted from this source: «MitsubishiMan»)
Check for identification marks on the connecting rods and connecting rod caps. If they are not visible, use a small punch to make the appropriate number of marks on each connecting rod and cap (1, 2, etc., according to the cylinder number).
Loosen each connecting rod cap nut in half-turn increments until they can be turned by hand. Remove connecting rod cap number 1 with the bearing shell - be careful not to drop the shell.
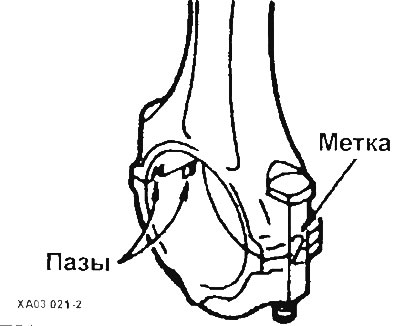
Typical connecting rod number marks
Place a piece of plastic or rubber hose over each connecting rod cap bolt to avoid damaging the crankshaft journal and cylinder bore when removing the piston.
Remove the bearing shell and push the connecting rod and piston out through the top of the engine. Push by pressing the wooden handle of the hammer against the connecting rod or piston.
Repeat this operation for the remaining connecting rods with pistons.
Assemble the connecting rods by installing the bearing shells and caps, and tighten the nuts with your fingers.