



Note: Detailed photographs of the brake system are provided in Chapter 9.
1. In addition to the inspection performed according to the periodic maintenance schedule, the brakes should be inspected each time the wheels are removed or if a malfunction is suspected. Any of the following signs may indicate a possible defect in the brake system. The car pulls to the side when braking: a squealing sound is heard when braking; braking distance too long; pedal pulsation; brake fluid leak, usually appearing on the inside of a tire or wheel.
2. Loosen the wheel mounting nuts.
3. Raise the vehicle and place it on stable stands.
4. Remove the wheels (see the Jacking and Towing section at the beginning of this manual or your owner's manual if necessary).
Disc brakes
5. Each brake mechanism has two shoes - outer and inner. The shoes are visible through small inspection holes in each brake mechanism.
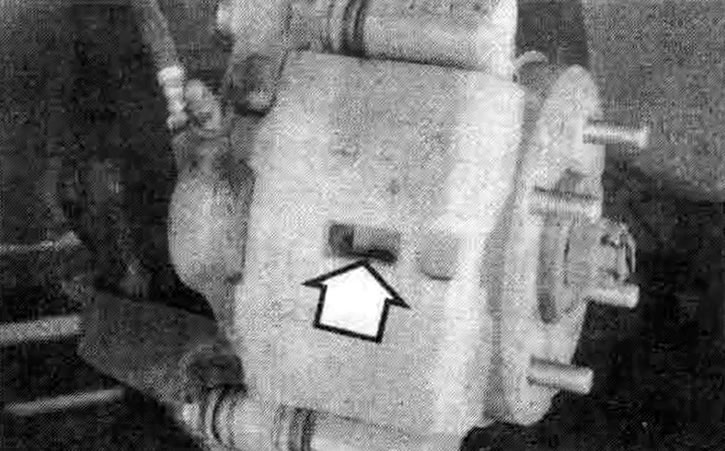
16.5. In each brake mechanism you will find an inspection hole - by placing a steel ruler across the hole you can determine the thickness of the remaining material of the inner and outer brake linings (arrow)
6. Visually check the thickness of the pads on each side of the brake mechanism and through the inspection hole in the caliper body. If the thickness of the brake lining material is less than the permissible value, replace the pads.
Note: Please note that the overlay material is riveted or glued to a metal plate, the thickness of which is not taken into account when measuring.
7. If it is difficult to accurately determine the thickness of the remaining lining material using the above method, or if you suspect poor lining condition, remove the brake assembly, then remove the pads from it for further inspection (see Chapter 9)
8. After removing the pads from the brake assembly, clean them with brake cleaner and re-measure them with a small steel pocket ruler or micrometer.
9. Check the disc. Look for deep scratches and burn marks. If these signs are present, the hub/disc must be removed (see Chapter 9).
10. Before installing the wheels, check the integrity of all brake pipes and hoses, their wear, deformation, absence of cracks, corrosion, leaks, kinks and twisting, especially rubber hoses near the brake mechanism. Check the tightness of the clamps and the absence of leaks at the joints. Make sure that all hoses and pipes are located away from sharp edges, moving parts and exhaust system components. If any of the above signs are detected, repair, re-lay or rearrange the pipes and/or fittings accordingly (see Chapter 9).
Rear drum brakes
11. Remove the brake drums as described in section 32.
Warning: Brake lining dust contains asbestos, which is hazardous to your health. Do not blow it away with compressed air or inhale it! Do not use gasoline or solvents to remove dust. Use brake system cleaner to flush dust into the pan. After wiping brake system components with a rag soaked in cleaner, place the contaminated rag and solvent in a closed and specially labeled container. Try to use asbestos-free components whenever possible.
12. Measure the thickness of the rear brake pad material and check for any traces of brake fluid or grease contamination. If the surface is less than 1.5 mm above the recessed rivets or metal base, replace the brake pads with new ones. The pads should also be replaced if they are cracked, shiny (shiny surfaces) or contaminated with brake fluid or grease. The replacement procedure is described in Chapter 9.
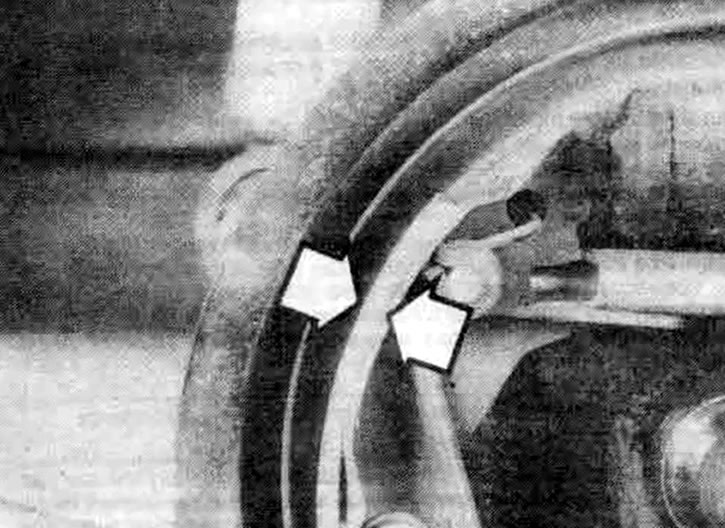
16.12. The thickness of the rear brake shoe lining is measured from the outer surface of the lining to the metal base (arrows)
13. Check the brake shoe return and pressure springs and adjuster mechanism to ensure they are correctly installed and in good condition. Dirty or warped springs, if not replaced, can cause seizure and increased brake shoe wear.
14. Check for leaks from the brake cylinders by carefully bending back the rubber boots. If brake fluid is visible under the boot, the brake cylinders need to be replaced (see Chapter 9).
15. Check the drums for cracks, burrs, deep scratches and tarnish. If the defect cannot be removed with sandpaper, the drums should be turned on a lathe (for more details, see Chapter 9).
16. Install the brake drums as shown in Chapter 9.
17. Install the wheels and tighten the wheel nuts by hand.
18. Remove the stands and lower the vehicle.
19. Tighten the wheel nuts to the specified torque specified at the beginning of this chapter.
Parking brake
20. A simple way to check the parking brake is to park the car on a slope with the transmission in neutral and the parking brake applied. If the parking brake is unable to prevent the car from rolling, it must be adjusted (see Chapter 9).