



Note: The following procedure assumes that the spark plug wires and distributor are installed correctly. If you are attempting to set TDC in order to install the distributor correctly, the piston position should be determined by compression through the spark plug hole of cylinder number one, and then the spark marks should be aligned as described in step 6.
1. Top dead center (TDC) is the highest point in the cylinder that the piston reaches during its forward motion as the crankshaft rotates. Every piston reaches TDC on the compression stroke and again on the exhaust stroke, but TDC usually refers to the piston's position on the compression stroke.
2. Setting the piston(s) to TDC is a key step in most procedures such as removing the rocker arms, camshaft, timing belt/sprocket and distributor.
3.Before starting work, make sure that the transmission is in neutral and the parking brake is applied or the rear wheels are blocked with chocks. Also, disable the ignition system by disconnecting the wire from the center terminal of the ignition coil cover and grounding it to the cylinder block using an auxiliary wire (models without the DIS digital ignition system). Remove the spark plugs (see Chapter 1).
4. To set the piston to TDC, you must turn the crankshaft using one of the methods described below. Normal crankshaft rotation occurs clockwise when looking at the engine from the front.
- a) It is preferable to turn the crankshaft with a ratchet socket wrench fitted to a bolt screwed into the front of the crankshaft.
- b) It is possible to use a remote starter switch, which can save some time. Follow the instructions supplied with the switch. Once the piston is close to TDC, use a ratchet socket wrench as described in the previous point.
- c) If it is possible to use an assistant who can briefly engage the starter by turning the key in the ignition switch, then it is possible to move the piston closer to TDC in this way without a remote switch. Make sure that the assistant is out of the car and away from the ignition switch before completing the procedure by turning the crankshaft with a ratchet socket wrench as described in point a).
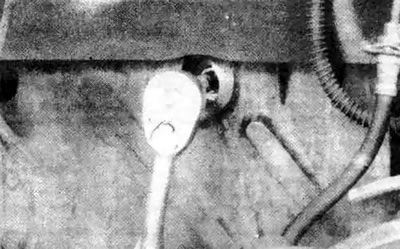
4.4 The crankshaft can be turned by placing a socket wrench on the crankshaft pulley centre bolt and threading an extension through the inner apron panel (wheel removed for clarity)
Article reprinted from the website [mitsubishiman.ru]
5. On models without DIS, remove the distributor cap and secure it to the side (see Chapter 1). On models with DIS, remove the valve cover (see Chapter 2A).
6. Turn the crankshaft (see point 3 above) until the slot on the crankshaft pulley aligns with the "T" mark on the ignition timing scale (located on the front of the engine).
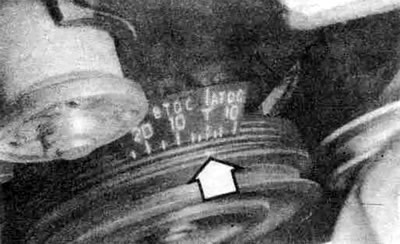
4.6a. Align the mark on the pulley (arrow) with the "T" mark on the ignition timing plate (drive belts and water pump pulley removed for clarity) (1.6L engine shown)
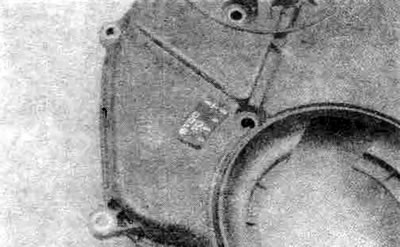
4.6b. On some engines, the ignition timing marks are located on the side of the timing belt cover (for clarity, the lower timing belt cover has been removed)
7. On models without DIS, look at the distributor rotor - it should be turned vertically downwards. On models with DIS, check the valve rocker arms of the first cylinder - they should be free and not press on the valves.
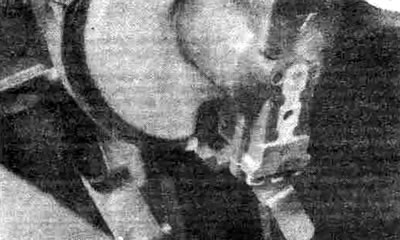
4.7. When the piston of the first cylinder is at TDC on the compression stroke, the distributor rotor should be facing straight down (note the paint strip applied to the cylinder head and ignition distributor, which is used to indicate the position of the piston of the first cylinder for correct assembly)
8. If the runner is turned 180° or the rocker arms are not free, then the piston of the first cylinder is at TDC on the exhaust stroke. Go to step 9.
9. To move the piston to TDC on the compression stroke, rotate the crankshaft a full revolution (360°) clockwise. Now the runner should be turned vertically downwards or the valve rocker arms should be free. When the runner points to the terminal of the spark plug wire of the first cylinder, located in the distributor cap or the rocker arms are free, and the ignition timing marks are aligned, then the piston of the first cylinder is at TDC on the compression stroke.
10. Once the first cylinder piston has been set to TDC on the compression stroke, all other pistons can be set to TDC by rotating the crankshaft taking into account the spark order. On models without DIS, with the distributor cap installed, use a marker or chalk to make marks on the distributor housing under all the terminals of the spark plug wires. Then number these marks according to the cylinder numbers. As the crankshaft turns, the rotor will also rotate. When the rotor points to one of the marks on the distributor, the piston of the corresponding cylinder is at TDC on the compression stroke.