
Removing
1. Disconnect a wire from the negative plug of the storage battery.
2. Drain the engine oil from the engine.
3. Remove the engine oil level indicator.
4. Remove the center beam.
5. Remove the lower protective cover.
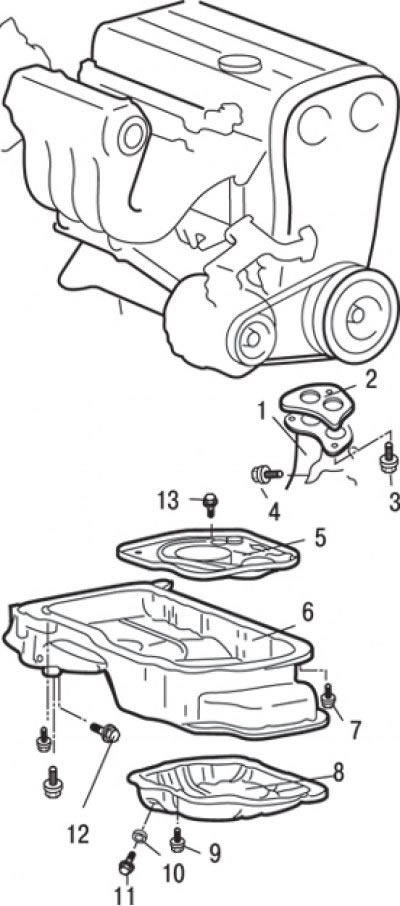
Pic. 3.31. DOHC engine oil pan: 1 – a reception pipe of system of release of the fulfilled gases; 2 - gasket; 3 - bolt, 49 Nm; 4 - bolt, 50 Nm; 5 - oil softener; 6 - the upper part of the oil pan; 7 - bolt, 10–12 Nm; 8 - the lower part of the oil pan; 9 - bolt, 7 Nm; 10 - sealing ring of the drain plug; 11 - drain plug, 39 Nm; 12 - bolt, 48 Nm; 13 - bolt, 7 Nm
6. Turn away nuts and remove a reception pipe 1 (pic. 3.31) exhaust systems and gaskets.
7. Using a wooden block, separate the lower part of the oil pan after unscrewing the mounting bolts by lightly tapping on the wooden block.
8. Unscrew plug 11 and remove sealing ring 10.
9. Insert the blade of a flat head screwdriver into the slot on top of the engine oil pan. Turning a screw-driver, separate the pallet from the block of cylinders.
10. Unscrew the bolts and remove the oil separator 5.
Installation
Installation is carried out in the reverse order of removal, taking into account the following.
1. Clean the sump with kerosene or a suitable solvent and remove external dirt and internal deposits. Clean the mating surfaces of the crankcase and engine block from the remnants of the old gasket. Check that surfaces are clean and dry.
2. Install the O-ring on the drain plug with the shouldered side toward the sump.
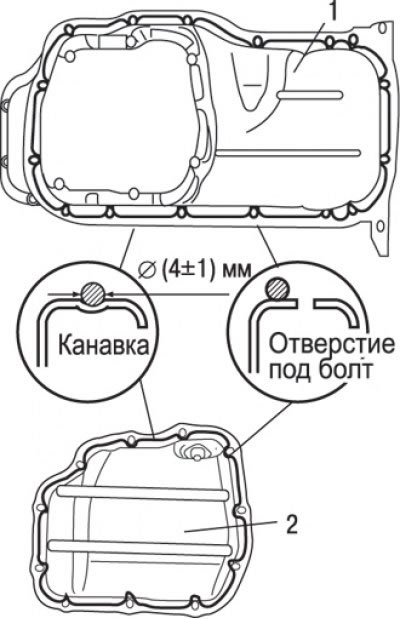
Pic. 3.32. Places for applying a layer of sealant Mitsubishi Genuine Part MD930389 or similar to the flange of the engine oil pan: 1 - the lower part of the pallet; 2 - the upper part of the pallet
3. Apply sealant in the form of a 4 mm diameter bead to the flange of the upper and lower parts of the oil pan (pic. 3.32).
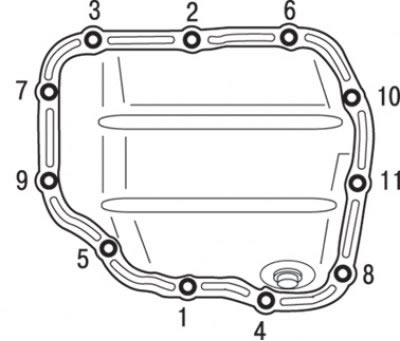
Pic. 3.33. The sequence of tightening the bolts of the lower part of the engine oil pan
4. After applying the sealant, tighten the bolts securing the lower part of the oil pan in the sequence shown in fig. 3.33.