



ATTENTION: The procedure for disassembling the cylinder head is the same for all engines, with the exception of minor differences.
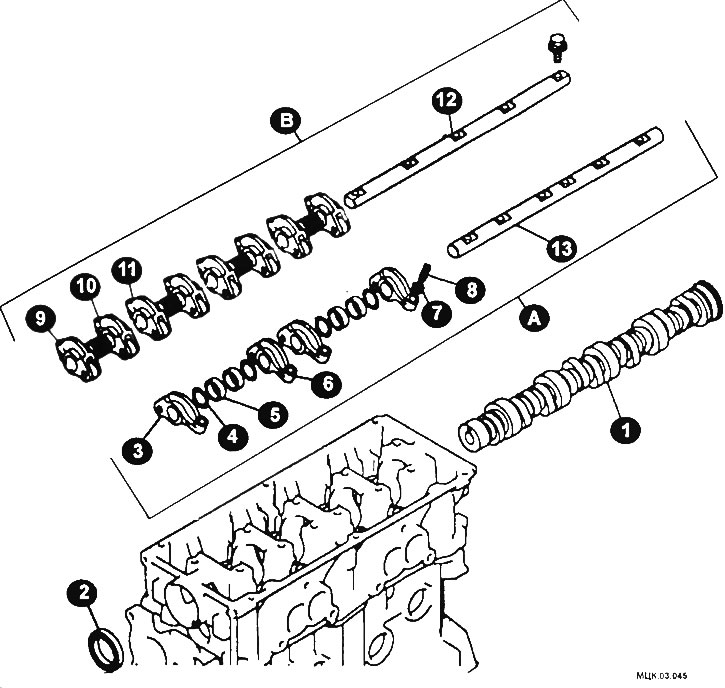
Camshaft elements of 4-cylinder 12-valve SOHC engines
A - exhaust valve elements; B - elements of intake valves; 1 - camshaft; 2 - oil seal; 3, 6 - exhaust valve rocker; 4 - adjusting washer; 3 - spacer sleeve; 7 - nut; 8 - adjusting screw; 9, 11 - intake valve rocker; 10 - spring; 12, 13 - rocker axis.
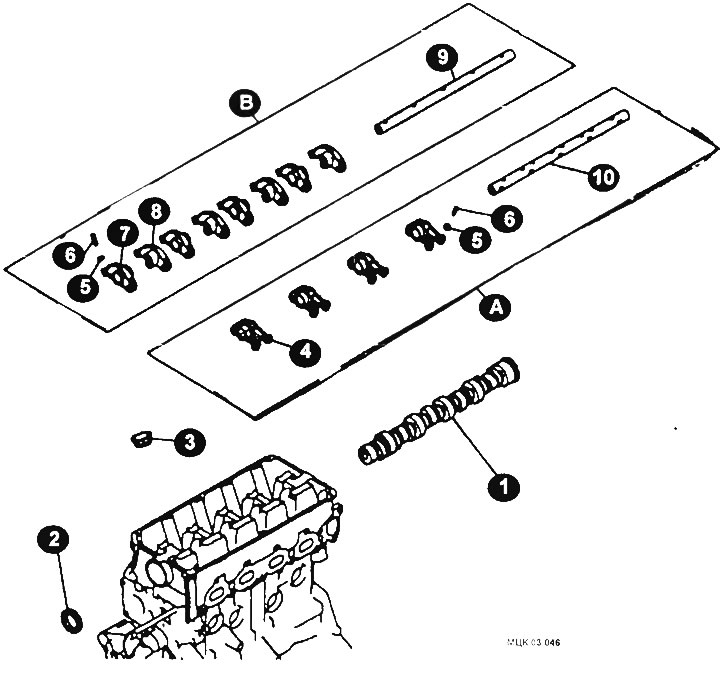
Camshaft components of 4-cylinder 16-valve SOHC engines (early models of the car)
A - exhaust valve elements; B - elements of intake valves; 1 - camshaft; 2 - camshaft oil seal; 3 - seal; 4 - exhaust valve rocker; 5 - nut; 6 - adjusting screw; 7, 8 - intake valve rocker arms; 9, 10 - rocker arm axles.
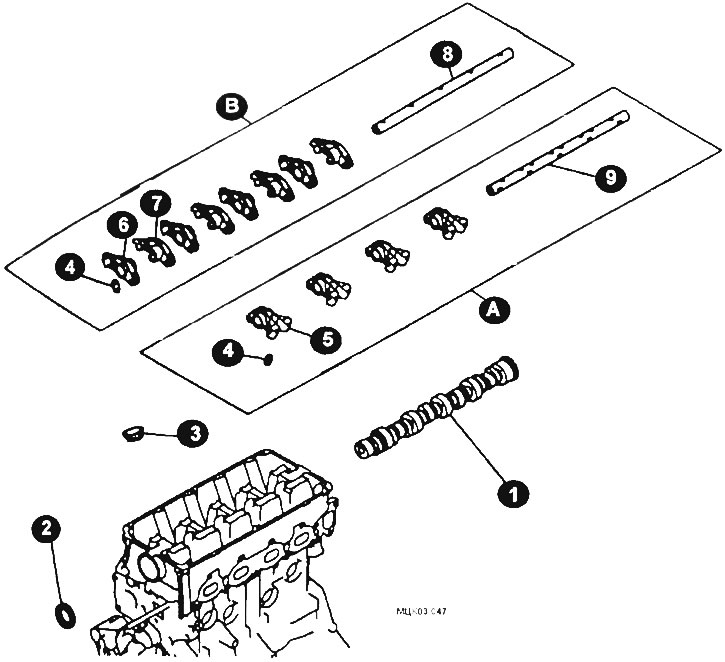
Camshaft components of 4-cylinder 16-valve SOHC engines (late models of the car)
A - exhaust valve elements; B - elements of intake valves; 1 - camshaft; 2 - camshaft oil seal; 3 - seal; 4 - hydraulic pusher; 5 - exhaust valve rocker; 6, 7 - intake valve rocker; 8, 9 - rocker arm axles.
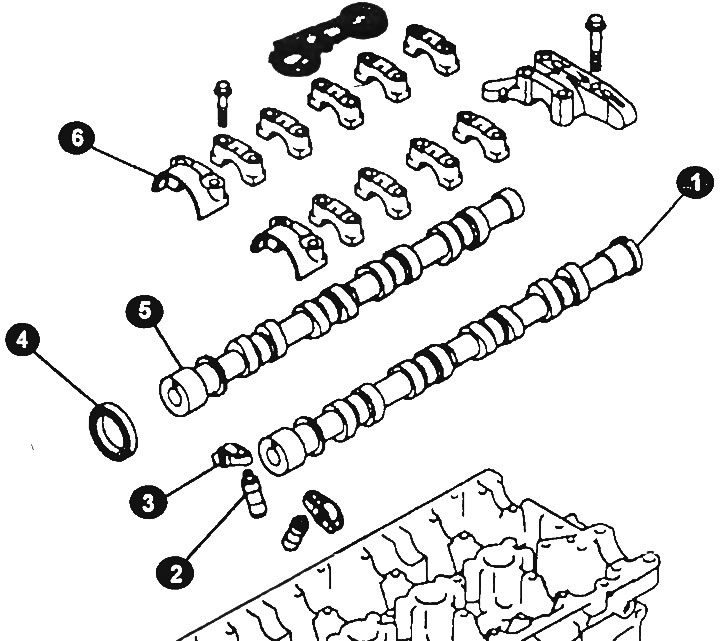
Camshaft elements of 4-cylinder 16-valve DOHC engines
1, 5 - camshaft; 2 - hydraulic pusher; 3 - rocker arm; 4 - camshaft oil seal; 6 - camshaft bearing cover.
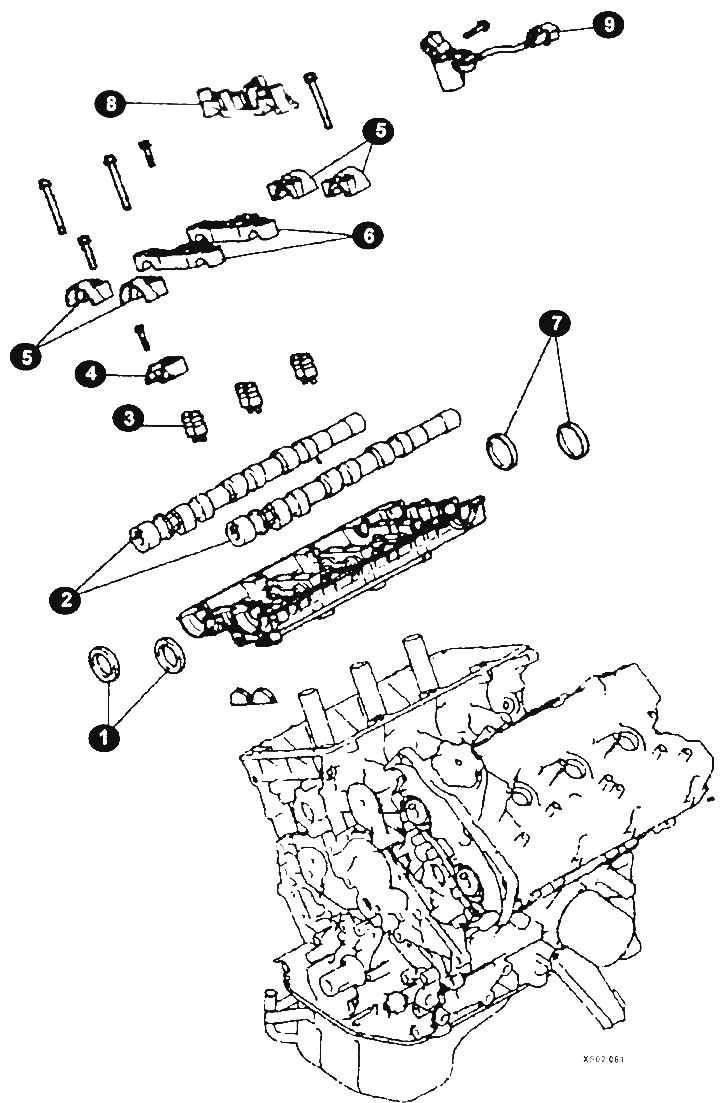
Camshaft elements of 6-cylinder engine 6A12 (DOHC)
1, 7 - oil seals; 2 - camshafts; 3 - hydraulic tappets; 4, 5, 6 - lids; 8 - oil pressure sensor cover; 9 - oil pressure sensor.
Disassembling the cylinder head involves removing all elements.
Label all parts and store them separately so that they can be returned to their original positions when installed.
Place the cylinder head on a table or in a vice.
If they have not been removed, then unscrew the coolant temperature gauge sensor and the oil pressure indicator lamp sensor.
Place the clamps on the hydraulic lifters (if any).
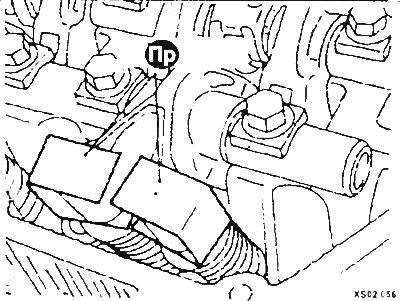
NOTE: It is recommended to replace the rocker arms together with the tappets for all cylinders at the same time.
After unscrewing the nuts, remove the valve drive.
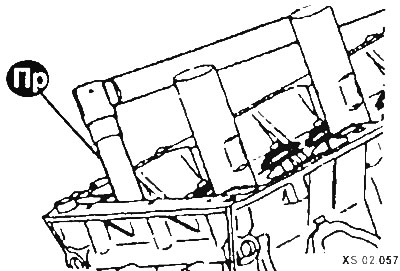
Remove the camshaft from the bearings.
Remove the valve lifters (if any) from the cylinder head hole.
Before removing the valves, mark them and store them with the associated parts so that they can be returned to their original positions when reinstalling.
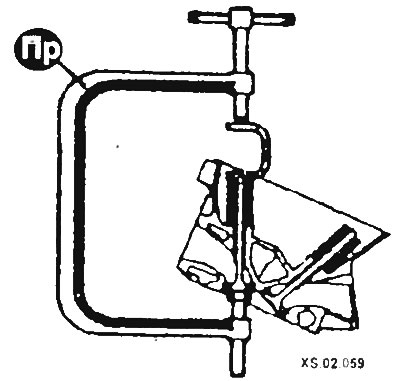
Install the valve compressor.
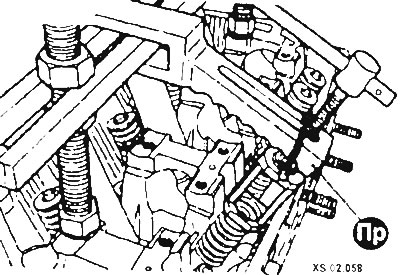
Compress the springs on the first valve with a tool and remove the crackers. Carefully release the spring, remove the plate, protective sleeve and springs.
Remove the valve seal. Remove the valve from the head. If the valve gets stuck in the guide (does not pass through it), push it back into the head and file the cracker groove and the end of the valve with a file.
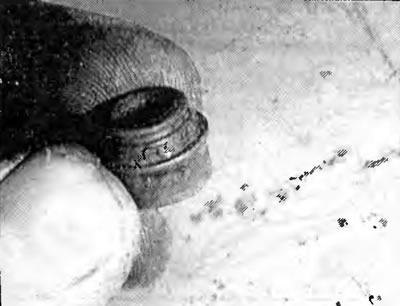
Remove the spring seat.
Repeat the procedure for the remaining valves. Remember to keep all the valve parts together so that you can install them in their original position when reassembling.
To quickly disassemble the valves, you can use the following method.
Place an old piston pin on the top valve plate and hit it with a hammer.
CAUTION: Be careful. This will cause the crackers to pop out and the springs to "jump".
Remove the valve components as described above.
CAUTION: A tool is required to install the valves.
Once the valves and all associated parts have been removed and stored properly, the head should be thoroughly cleaned and inspected. If the engine is being completely disassembled, complete this process before working on the cylinder head.