



Remove the oil pan.
Remove the oil filter and oil temperature sensor.
Remove the valve body. The manual control valve may come out, be careful not to drop it.
Turn the adjusting bolt of the adjusting valve until the system pressure (forced downshift pressure) reaches the standard value.
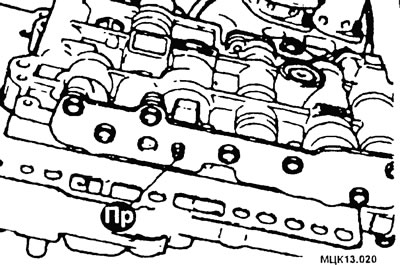
When the adjusting bolt is turned to the right, the pressure in the system decreases, and when it is turned to the left, it increases.
NOTE: Required deprivation: 870-890 kPa. Oil pressure change with each turn of the adjusting bolt: 38 kPa.
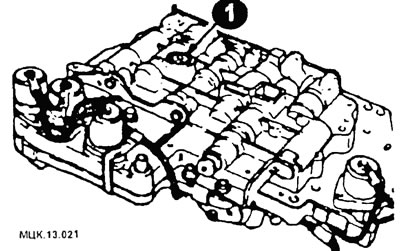
Make sure that the sealing ring (1) installed on the top surface of the valve body is located in the position shown in the figure.
The text of the article was taken from the website: mitsubishiman.ru
Replace the solenoid valve connector O-ring with a new one.
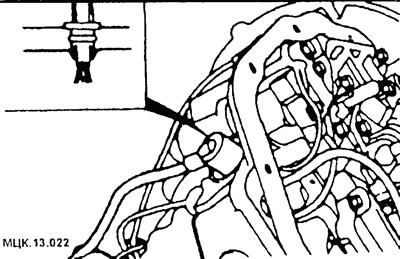
Install the valve body assembly, then insert the solenoid valve connector into the body, making sure that the notched part of the connector is positioned as shown in the figure.
Also make sure that the wire is not pinched.
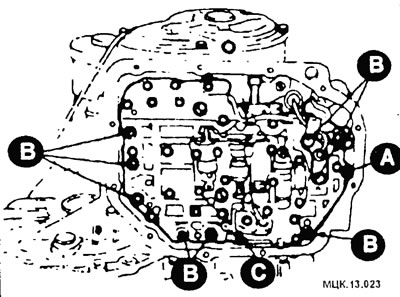
Tighten the valve body mounting bolts to 10-12 Nm. Keep in mind that the bolts are different lengths, bolt A is 18 mm; bolt B - 25 mm; bolt C - 40 mm.
Install the oil filter.
Install a new oil pan gasket and oil pan, then tighten its mounting bolts.
Add the required amount of automatic transmission fluid.
Check the oil pressure in the system. Adjust if necessary.